A Calculated Whisk

Creative paleo and gluten-free recipes

  • Home
  • About Me
    • Photography Portfolio
  • Cookbook
  • Recipe Index
  • Paleo
    • Paleo Eating
    • A Paleo Pantry
  • Blogging
You are here: Home / Archives for chocolate

Grain-free Vanilla Bean Cupcakes with Mocha Buttercream

September 9, 2013 By Becky 9 Comments

This post contains affiliate links. As an Amazon Associate I earn from qualifying purchases.

Grain-free Vanilla Bean Cupcakes with Mocha Buttercream (Gluten free, Nut free) | acalculatedwhisk.com
 

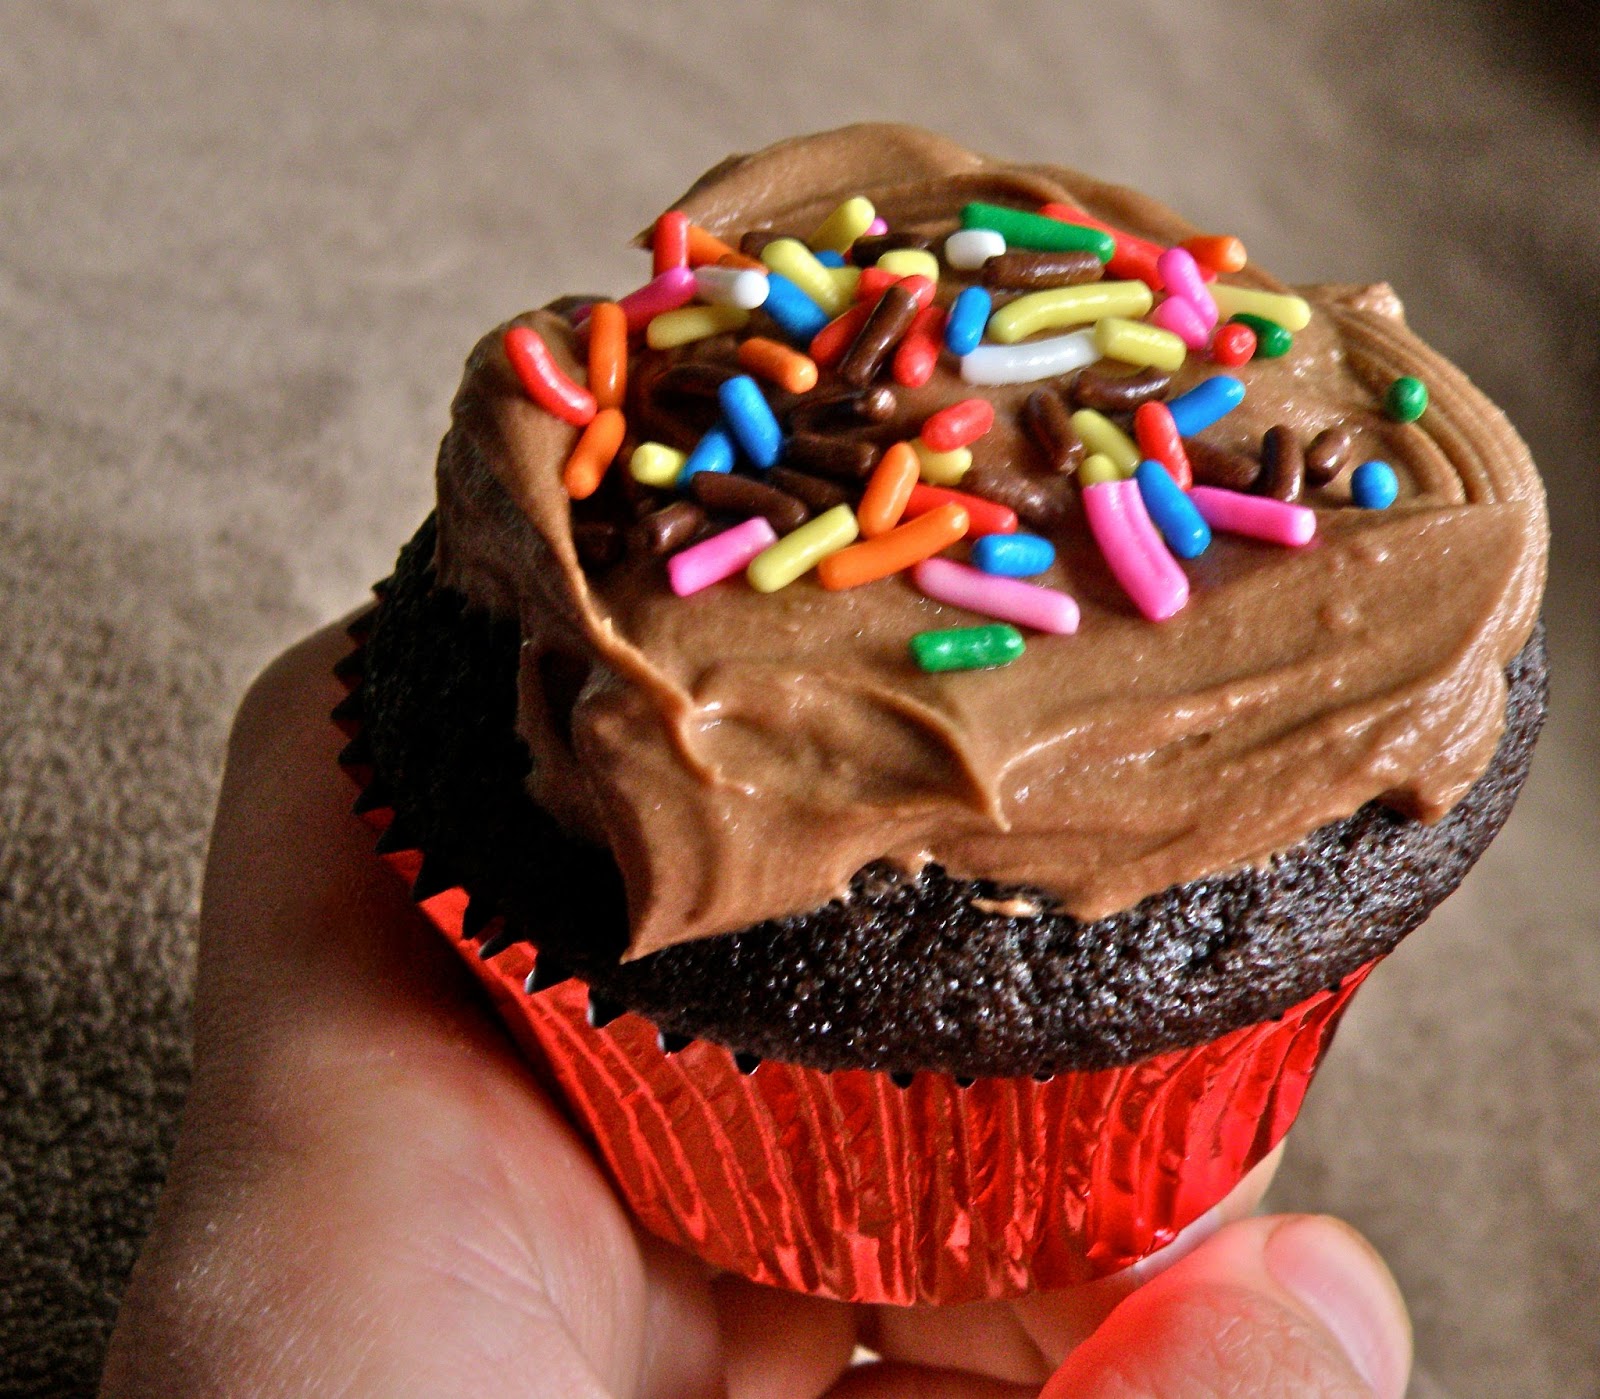
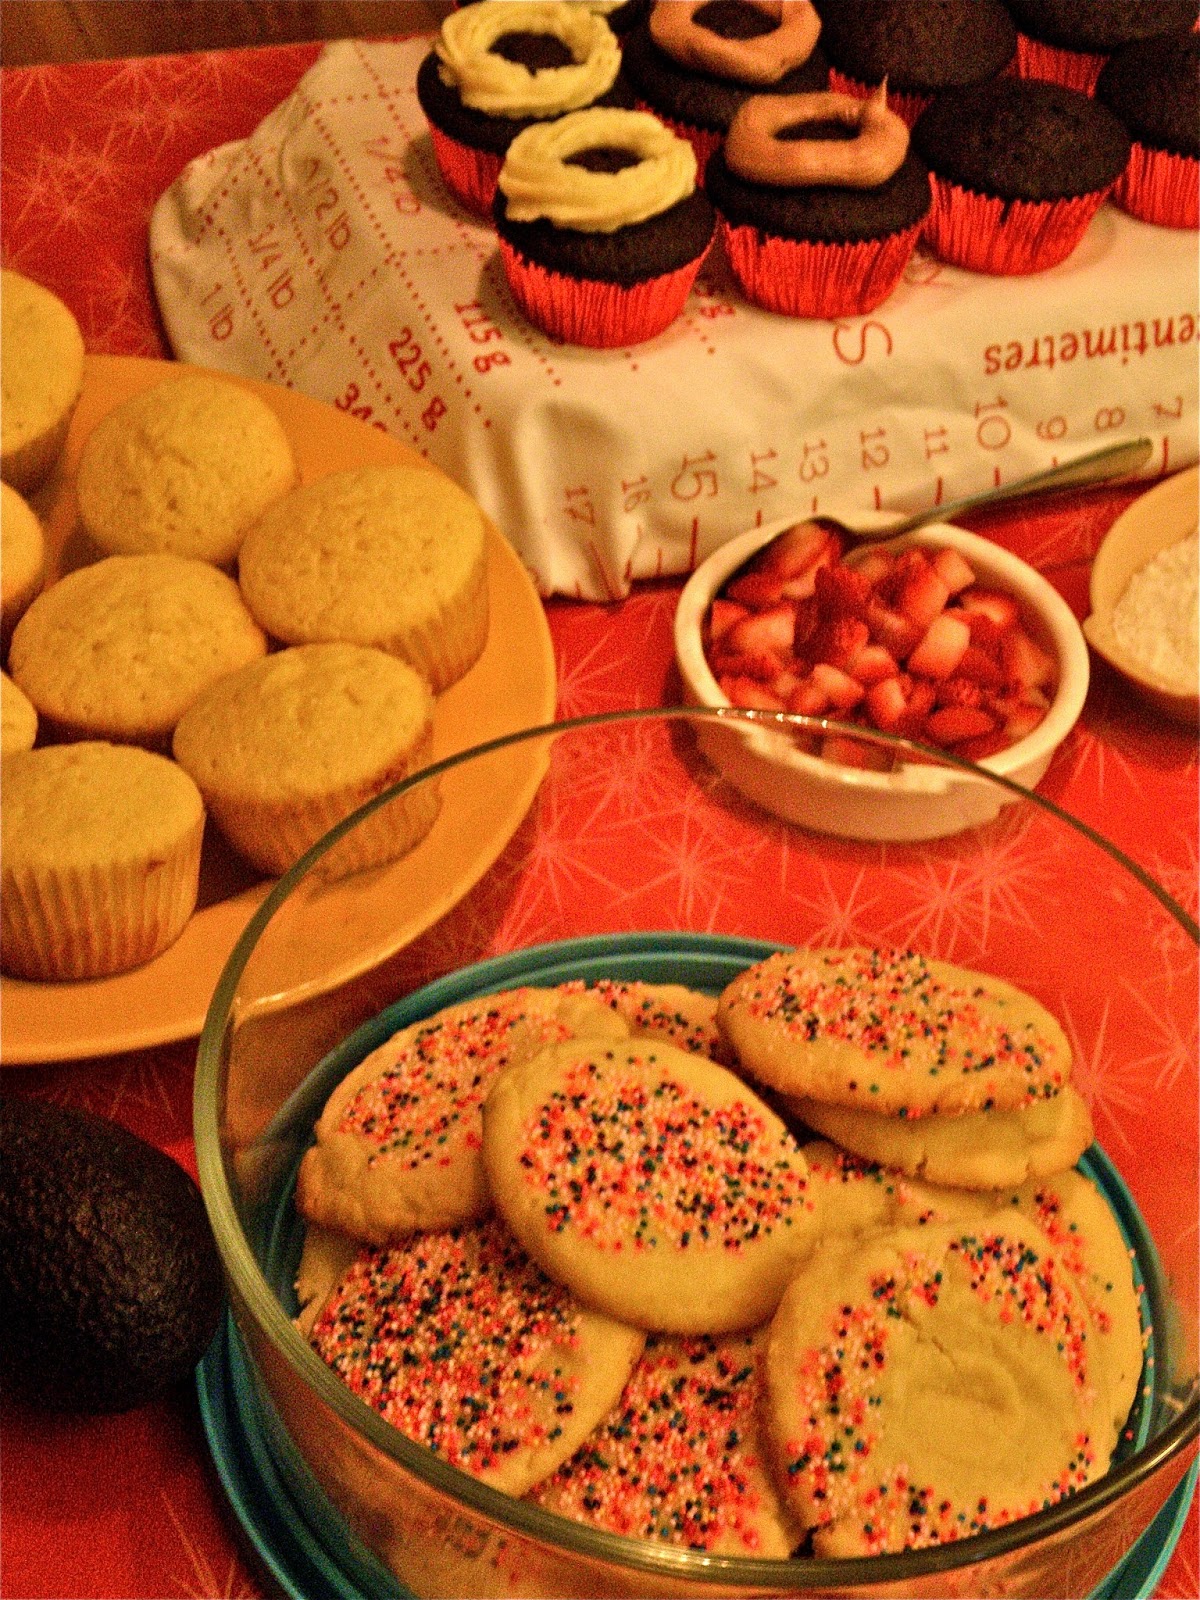
Treat yourself to small batch of  paleo-friendly, grain-free vanilla bean cupcakes with mocha buttercream! They’re made with coconut flour, so they’re also nut free.

I’ve really been craving a classic vanilla cupcake recently, and wanted to try my hand at making grain-free vanilla bean cupcakes. To me, vanilla beans are the epitome of classic elegance in dessert flavor form.  I ordered half a pound of vanilla beans online months ago, used half of them to make a bunch of little bottles of homemade vanilla extract (find out how to do that yourself here!), and still have a bunch left.  I highly recommend ordering beans online in bulk, since it’s much more economical and they’re likely to be much fresher than overpriced grocery store beans.
 
These cupcakes are light and fluffy, because they’re made with coconut flour instead of almond flour.  Of all the paleo & gluten-free treats I’ve made, these may be the closest in taste and texture to their gluten-laden cousins.  I highly recommend them!  They’re also perfect for people with nut allergies or for bringing to birthday celebrations in nut-free classrooms.  This recipe makes a very small batch (good for people like me with no restraint), but can easily be doubled.
 

Read More…

Filed Under: gluten free, paleo, recipe Tagged With: baking, chocolate, coconut flour, coffee, cupcakes, dairy free, mocha, nut free, vanilla, vanilla bean

Double Chocolate Zucchini Muffins (Gluten free, Paleo)

August 31, 2013 By Becky 28 Comments

 These grain-free double chocolate zucchini muffins strike the perfect balance between healthy and indulgent eating.

It’s strange not to be getting a classroom set up this time of year. To get my classroom layout fix, I went to help my friend set up her room. She’ll be teaching kindergarten, and her space is amazing! Her classroom has its own coatroom with a full length cubby for each kid, plus a bathroom. The room has lots of windows on two sides, tons of built-in storage, and TWO sinks at the back–one kid height and one regular. On top of all that, the building is air conditioned! In six years of teaching, I definitely never had it that good.

Anyway, I wanted to bring something for me and my friend to snack on while we set up her classroom, and since I was going there mid-morning, I decided double chocolate zucchini muffins would be just the thing.  I went with double chocolate muffins because what I really wanted was to make cupcakes.  These are the perfect happy medium, and I snuck in a zucchini to make them extra moist and even more healthy.
A weird thing happened with these muffins.  Let me know if you have any insights about this muffin mystery: when I tried a warm muffin before leaving the house, some of the muffin stuck to the paper liner.  Not a ton, but a fair amount.  I then wrapped some muffins in tinfoil to bring with me, but left the top of the tinfoil open since the muffins were still warm.  At my friend’s school, the papers peeled off the muffins with virtually no crumbs attached–completely clean.  The next morning, I expected the muffins I had left at home to do the same thing, since I assumed it was from cooling completely.  But no!  Crumb stuck on the liner again.  So–did wrapping the bottoms of my muffins in tinfoil while they were still warm make the papers come off with no crumbs?  If so, I might have to try that trick every time I make muffins or cupcakes!  Any thoughts?
Anyway, on to the recipe.  I hope these double chocolate zucchini muffins will help you strike the perfect breakfast balance.
If you’re looking for more amazing paleo muffins, check out the Papaya Pecan Muffins in my cookbook Paleo Planet. They’re on page 231! 

Read More…

Filed Under: breakfast, gluten free, paleo, recipe Tagged With: almond flour, baking, chocolate, coconut flour, muffins, zucchini

Cherry Blondies & Homemade Almond Butter (Paleo, Gluten free)

August 29, 2013 By Becky 7 Comments

These are so good!  Elana of Elana’s Pantry is a total genius, because she figured out that almond butter, eggs, and honey will magically bake up into BLONDIES.  Yes!  Fudgy, delicious blondies.  When you read the recipe, you’ll think there must be a mistake.  I am here to tell you there isn’t!  Almonds prove themselves here once again as a miracle food.  I promise you will love these.  You don’t even have to add cherries; you can just make them without for regular blondies.  And don’t worry about the almond extract.  I was trying to play up the almond flavor a little, but it didn’t really come through.  So you could leave it out, leave it in, or even try a full teaspoon if you want that little hint of marzipan flavor.

Read More…

Filed Under: dessert, gluten free, paleo, recipe Tagged With: almond butter, baking, bars, blondies, cherries, cherry, chocolate, dairy free

Brownie Batter Truffles (Gluten free, Paleo)

August 25, 2013 By Becky 2 Comments

Yesterday I wanted brownies, but the thought of waiting for them to bake and then cool was disagreeable.  I thought about making brownie batter truffles instead.  Since there’s no egg in this recipe, you can taste as you’re making it and adjust the sweetness as desired.  If you’re in a really big hurry, you can skip melting the chocolate and roll these in cocoa powder or shredded coconut.  You can get your brownie fix on pretty fast.

Read More…

Filed Under: dessert, gluten free, paleo, recipe, vegan, vegetarian Tagged With: brownies, candy, chocolate, dairy free, dates, no-bake, truffles

Cherry (Chocolate) Almond No-Churn Ice Cream

August 10, 2013 By Becky Leave a Comment

I am SO excited about this post.  This ice cream is ridiculously good, ridiculously healthy, and ridiculously simple, and I have made it three times since I invented it two days ago.  There are five ingredients, and you don’t need an ice cream maker.  There are also NO sweeteners.  This is the stuff dreams are made of.  Well, my kind-of cheating whole30 dreams, at least.

Read More…

Filed Under: gluten free, paleo, recipe, vegan, vegetarian Tagged With: almond, almond butter, cherry, chocolate, cocoa, coconut milk, dairy free, five ingredients or less

Lemon Cheesecake Truffles

July 9, 2013 By Becky 2 Comments


Truffles are the perfect summer dessert, especially when there’s lemon involved.  You can make these without even using your stove, and since they’re kept in the fridge, they’re refreshing on a hot day.  These truffles have a rich and creamy cheesecake interior with lemony undertones, a snappy chocolate shell, and crunchy, zesty lemon sugar on top.  They are so rich that I feel satisfied with just one or two for dessert.
 
You should make these because they are much easier, cuter, and smaller than cheesecake.  You can impress your friends by presenting all the delicious flavors of cheesecake in a small, round, chocolate-dipped form.  And in case you’re wondering, lemon and chocolate DO go together well.  It’s like orange and chocolate, but punchier and more summery.  Try it.  Try it today!


Ingredients (makes about 15 truffles):

For the cheesecake filling:

1 lemon
8 ounces cream cheese
Pinch of salt
1 cup powdered sugar
A few drops of vanilla

For the topping:

3 tablespoons granulated sugar

For the chocolate coating:

7 ounces bittersweet chocolate, chopped
1/2 teaspoon vegetable oil
A few drops of vanilla

Zest the lemon.  Set aside half the zest and toss it to coat with the granulated sugar to make the topping.  Spread the lemon sugar out on a plate in a thin layer so it can dry out a little.  You definitely don’t want to skip this part, because the crunchy, zesty sugar is going to take these truffles from delicious to ridiculous.

Place the other half of the zest in a medium bowl with the cream cheese, salt, sugar, and vanilla.  Juice the lemon to obtain three tablespoons of juice, and add them to the bowl, making sure to strain out any seeds.  Use a fork to cream this mixture until well combined.  Cover the mixture and place it in the freezer for half an hour or so to firm up.

Line a baking sheet with parchment or wax paper.  Use a spoon and your fingers to form rounded teaspoon-sized balls of cheesecake mixture and place them on the parchment-lined cookie sheet.  Don’t worry if the balls aren’t perfect, because you will have a chance to smooth them out later.  Freeze the balls for at least two hours so they’re totally firm.

When your truffles are almost frozen, it’s time to melt the chocolate.  Place the chopped chocolate, oil, and vanilla in a microwaveable bowl.  The oil is just there to help make the chocolate coating a little bit shiny.  Microwave the bowl in thirty-second intervals, stirring in between, until almost melted.  Stir until the chocolate is completely smooth.  Set the chocolate aside to cool for a few minutes before you dip your truffles.

Line another baking sheet with parchment or wax paper so you’ll have a spot for your dipped truffles.  Take the truffles out of the freezer.  Working with one ball at a time, roll it quickly between your palms to round it out, then drop it in the chocolate, turning it a little to fully coat it.  Use a fork to carefully fish the truffle out of the chocolate.  Let the excess chocolate drip off, then carefully transfer the truffle to the parchment paper.  Sprinkle the top of the truffle with a little lemon sugar right away.  You don’t want to wait until you’ve dipped all the truffles because once the chocolate is hardened the lemon sugar won’t stick.

Once you’ve dipped all the truffles, place the baking sheet in the refrigerator for about half an hour so the chocolate can set.  When the truffles are set, they are ready to eat.  If you won’t be enjoying them right away, store the truffles in an airtight container in the refrigerator for up to a week.

Filed Under: dessert, gluten free, recipe Tagged With: candy, cheesecake, chocolate, lemon, truffles

Mint Chocolate Chip Ice Cream with Homemade Magic Shell

July 7, 2013 By Becky 2 Comments


Several weeks ago, I made mint chocolate chip ice cream.  It’s Ben’s favorite flavor, and I really like it, too.  It was late at night when it was ready to eat, so we had some, and the next day I asked Ben not to finish it while I was at work so I could get some pictures later.

Well, guess who conveniently forgot about what I said?  It’s all worked out pretty well for him, though, because I just had to go ahead and make more mint chocolate chip ice cream.

It’s also working out pretty well for me, because I just got my hands on a copy of Jeni’s Splendid Ice Creams at Home.  It’s my kind of book!  It has so many delicious and creative ice cream recipes, organized by season.  And, it has lots of recipes for sauces, mix-ins, and sundaes.  It even has a recipe for macaron ice creams sandwiches.  I love it!

Jeni’s ice cream base has a few interesting ingredients (cream cheese and cornstarch, for example), but they result in an ice cream that stays creamy and scoopable day after day.  You have to try this!

Ingredients (makes one quart; adapted from Jeni’s Splendid Ice Creams at Home):

For the ice cream:

1 tablespoon plus 1 teaspoon cornstarch
3 tablespoons cream cheese, softened
1/ 4 teaspoon salt
2 cups whole milk
1 1/4 cups heavy cream
2/3 cup sugar
2 tablespoons light corn syrup
Handful of fresh mint leaves, torn into pieces
1/4 teaspoon vanilla
3 tablespoons green creme de menthe (optional)

For the chocolate chips and magic shell:

7 ounces bittersweet chocolate, chopped
3 tablespoons coconut oil
1/4 teaspoon vanilla

In a small bowl, stir together the cornstarch and two tablespoons of the milk to form a smooth paste.

In a medium bowl, whisk the cream cheese and salt until smooth.

Heat the cream, remaining milk, sugar, and corn syrup in a saucepan over medium heat.  Bring it to a boil, and boil for four minutes.  Remove from the heat, and gradually mix in the cornstarch paste.  Return the mixture to a boil and cook for about a minute, stirring, until somewhat thickened.

Slowly pour the hot milk mixture into the bowl with the cream cheese, whisking until smooth.  Stir in the vanilla, creme de menthe if using, and mint leaves. (If you decide not to use the creme de menthe, your ice cream won’t be green.  You can always add food coloring if you want.)

Refrigerate the mixture for at least four hours to chill and infuse the milk with minty flavor.  When ready to freeze the ice cream, strain out the mint and freeze in your ice cream maker.

To make the chocolate chips and magic shell, heat the coconut oil and chocolate in a double boiler, stirring until melted and smooth.  Stir in the vanilla.  Cool to room temperature before layering with the ice cream.

When the ice cream is done, put a thin layer of chocolate in the bottom of an airtight container.  Add a layer of ice cream, then drizzle on some chocolate.  Keep layering until the ice cream is all packed up, using just about 2/3 of the chocolate.

Freeze the ice cream for at least four hours before serving.

Magic shell should be liquid at room temperature, but can be microwaved if necessary.  To serve, spoon a little chocolate on top of your ice cream and watch the magic.

Magic shell will keep in the refrigerator for three weeks.

 
This post contains affiliate links. As an Amazon Associate I earn from qualifying purchases.

Filed Under: recipe Tagged With: chocolate, ice cream, magic shell, mint, mint chocolate chip

Chewy Chocolate Almond Cookies

June 16, 2013 By Becky 2 Comments


Guess what?  In only 20 minutes, you can have rich, chewy chocolate almond cookies with no gluten, no butter or oil, no egg yolks, and no dairy!  It sounds too good to be true, but these cookies are really delicious!

You’ll end up with a couple of egg yolks, which you could save for ice cream.

The bad news is that my bag of almond flour is now almost gone!  I’ll definitely be buying more.  From financiers to mocha brownies to these cookies, it’s my new favorite healthy baking ingredient.  Go get some and make these today!

Note:  You won’t taste the coffee in these cookies–I just added it to bring out the chocolate flavor.  You can leave it out if you want a decaf cookie :0.

Ingredients (adapted from Heather’s Dish):

2 cups almond flour
1/2 cup sugar
2 rounded tablespoons cocoa
1 teaspoon finely ground coffee (optional)
1/4 teaspoon salt
2 egg whites
1/2 teaspoon vanilla
1/4 teaspoon almond extract (optional)

Preheat the oven to 350, and line a cookie sheet with parchment paper.  In a medium bowl, mix together the dry ingredients.  Add the egg whites, vanilla, and almond extract and stir until the dough comes together.

Drop tablespoon-sized balls of dough onto the parchment paper, and flatten the tops slightly with your hand or a spoon (the cookies will not spread much at all while cooking).  Bake for 10-15 minutes, until crisp on the outside but not burned on the bottoms.  Cool on a wire rack.

Filed Under: dessert, gluten free, recipe Tagged With: almond, almond flour, baking, chocolate, cookies, dairy free, healthy

Mocha Almond Flourless Brownies

June 8, 2013 By Becky 4 Comments

Yesterday I got some almond flour and blue cornmeal in the mail from Bob’s Red Mill.  I was super excited to try some chocolate baked goods with the almond flour.  Did you know it’s just ground-up almonds?  Amazing.  Full of heart-healthy fats and protein instead of the empty carbs in flour.

I decided to try these flourless brownies, adapted from this recipe on Om Nom Ally.  They are really good!  The coffee and almond flavors are subtle, but add an extra richness to the chocolate flavor.  The brownies are really fudgy and moist, which makes them very satisfying.  Just one is enough (until the craving strikes again an hour later…).

These brownies are not overly sweet.  I actually added extra sugar, because the original recipe only called for 2 tablespoons and I didn’t want a bitter brownie.  I think my version came out great, but I would have dusted them with some powdered sugar if I hadn’t been out.

Ingredients (makes 9-12 brownies):

1 cup almond flour (finely ground almonds)
1/2 cup cocoa, plus extra for dusting
1-3 teaspoons finely ground coffee, to taste
1/4 teaspoon salt
1/2 teaspoon baking powder
1/2 cup sugar
1 stick (8 tablespoons) butter, melted, plus extra for greasing the pan
1/2 cup milk
2 eggs
1 teaspoon vanilla
1/2 teaspoon almond extract
Powdered sugar for dusting (optional)

Preheat the oven to 350.  Grease an 8 x 8 baking dish and powder the bottom and sides with cocoa.

In a large bowl, mix the almond flour, cocoa, coffee, salt, and baking powder.

In a small bowl, whisk together the sugar, butter, milk, eggs, and extracts.  Add the wet ingredients to the dry and mix until combined.

Pour the batter into the prepared pan, and bake for 25-30 minutes or until a toothpick comes out clean.  Cool and cut into squares.


Filed Under: dessert, gluten free Tagged With: almond, baking, brownies, chocolate, coffee, flourless, mocha

A Cupcake Party and Simple Chocolate Buttercream

May 20, 2013 By Becky Leave a Comment

We had a decorate-your-own cupcake party last night!  I got the idea from this post on A Beautiful Mess.  People had so much fun choosing a cupcake flavor and heaping on toppings inside the ring of frosting.  Carrot cupcakes were the most popular, and I saw lots of people spooning on strawberry curd.  It wasn’t too bad waking up to leftovers this morning, either.  I am a big fan of cake for breakfast.  Maybe the decorate-your-own cupcake station can become a permanent feature around here?
In case you want to throw your own cupcake party, here are the recipes I used:
  • Carrot Cupcakes with Vanilla Bean Neufchatel Frosting
  • Double Chocolate Vegan Cupcakes
  • Vanilla Bean Cupcakes from Annie’s Eats
  • Strawberry Curd
  • Salted Caramel Sauce
For the chocolate cupcakes, I was too lazy to make the Swiss meringue buttercream that’s in the post for the Double Chocolate Vegan Cupcakes, so I made a simple chocolate buttercream.  Here’s the recipe in case you want to make it!


Ingredients (makes enough for 12 cupcakes): 

8 tablespoons (1 stick) butter, softened
1 1/2 cups powdered sugar, sifted
2 ounces bittersweet chocolate, melted
Pinch of salt 

Combine all ingredients and beat on high speed until smooth.

I also put out these toppings:
  • Shredded coconut
  • Chopped pecans
  • Chopped strawberries with a little sugar
  • Sprinkles
  • Mini m & ms
There are so many other things that would be great on cupcakes!  What are your favorite cupcake flavors, frostings, and toppings?

(function() {
var li = document.createElement(‘script’); li.type = ‘text/javascript’; li.async = true;
li.src = (‘https:’ == document.location.protocol ? ‘https:’ : ‘http:’) + ‘//platform.stumbleupon.com/1/widgets.js’;
var s = document.getElementsByTagName(‘script’)[0]; s.parentNode.insertBefore(li, s);
})();

Filed Under: recipe Tagged With: baking, buttercream, chocolate, cupcakes, entertaining, five ingredients or less, frosting, party

Make Your Own Chocolate Truffles (plus Vegan Coconut Almond Truffles)

April 8, 2013 By Becky Leave a Comment

Chocolate truffles are so easy to make, it’s amazing that places like Godiva get away with charging so much for them.  If you want yours to be even more like the ones at the chocolate shop, you can melt your favorite milk or dark chocolate and dip the chilled truffles in it instead of rolling them in cocoa powder and confectioner’s sugar.  Use a fork to remove the truffle once it’s covered in melted chocolate.  Let the extra drip off, and place the truffle on wax or parchment paper or in a candy cup.   This is a deliciously rich, fancy, no-bake dessert that will impress anyone.  Chocolate truffles also make a great gift wrapped up in a cellophane bag or placed in a decorative box or tin.  This recipe makes about 20 truffles.

Ingredients (adapted from Barefoot in Paris by Ina Garten): 
       ½ cup heavy cream
       3.5 ounces bittersweet chocolate
       3.5 ounces semisweet chocolate
       1 tablespoon brewed coffee
       ½ teaspoon vanilla or other flavoring
       Pinch of salt
       1 tablespoon Grand Marnier or other liqueur of your choosing
       5 ounces melted chocolate for dipping (optional)
       Cocoa and powdered sugar for rolling (optional)
Break the chocolates into small pieces and place in a bowl (don’t use chocolate chips instead of bars, because they have additives you don’t want in this recipe).  Bring the cream to a boil, then quickly pour it through a sieve into the bowl with the chocolate.  Use a whisk to stir until the chocolate is melted and the mixture is smooth.  If your chocolate isn’t quite melted, put the bowl over a pan of simmering water and stir until smooth.
Add the coffee, vanilla or other extract, salt, and liqueur and whisk until smooth.  Chill the mixture for at least 45 minutes, until firm enough to scoop.
When the mixture is firm, use a melon baller or small ice cream scoop to form balls, and place them on a sheet of parchment paper.  Don’t worry if the balls aren’t totally round and smooth; you will have a chance to perfect them later.
Chill the balls for about 15 minutes, then roll them in cocoa and mold them into spheres.  Chill overnight is possible, then roll in powdered sugar before serving.  Or, roll yours in a mix of cocoa and powdered sugar like I did.  Alternately, place in the freezer for about 15 minutes, then dip into a melted chocolate of your choice.


Vegan Coconut Almond Truffles

Ingredients:
       3.5 ounces bittersweet chocolate (check the label to make sure the brand you’re buying doesn’t have any milk products)
       3.5 ounces semisweet chocolate
       ½ cup coconut milk
       ½ teaspoon vanilla
       ½ teaspoon almond extract
       1 tablespoon brewed coffee
       Pinch of salt
       4 tablespoons shredded coconut
       4 tablespoons sliced almonds
Melt the chocolate as described in the recipe above, using coconut milk instead of cream.  Add the extracts, coffee, and salt and whisk to combine.
Grind the coconut and almonds in the food processor until fine.  Stir half of the nut mixture into the chocolate and save the rest for rolling.
Proceed as in the above recipe, chilling the chocolate mixture before forming it into balls.  Instead of cocoa, roll the chocolates in the coconut and almond mixture.

Filed Under: gluten free, recipe, vegan Tagged With: almond, candy, chocolate, coconut, DIY, make your own

Chocolate Mousse with a Secret Ingredient

April 5, 2013 By Becky 2 Comments

Here it is…another fabulous vegan dessert!  You
have to try this.  It’s easier than easy, and super delicious.  No
cooking is involved, and it comes together in less than five minutes.

So, I told you it’s vegan.  Can you guess what
the secret ingredient is? I will give you one hint: it’s not avocado
(although I have been wanting to try this recipe for chocolate avocado pudding).

Here’s a picture of the process:

Have you figured it out?  It’s coconut cream!
 Isn’t that crazy?  Maybe you already knew about this whipped coconut
cream miracle, but I had no idea until I saw this photo tutorial
the other day. Today after dinner (I tried to make shrimp korma—it was
pretty good but I want to tweak the recipe before I share it with you) I
had an extra can of coconut milk and a hankering to try it.  But, I
felt like it would be lame to just make and eat a bowl of whipped
coconut cream.  So, I searched for a dessert featuring this amazing
stuff, and found and adapted this recipe from
Baking Chic.  If you have a can of coconut milk, go put it in the
refrigerator right now so you can make this tomorrow.  If you don’t have
a can of coconut milk, go out and buy one, then put it in the
refrigerator so you can make this tomorrow.  If you’re in a big hurry,
put your can in the freezer so you can make this in half an hour.

Ingredients (serves one):

Cream from one can of coconut milk, chilled
1-3 tablespoons cocoa, to taste
1-3 tablespoons sugar, to taste
1/2 teaspoon vanilla

Open the can of coconut milk, and spoon the hardened cream off the
top.  Save the liquid for something else, like a smoothie.  Using an
electric mixer, whip the coconut cream until fluffy.  Mix in sugar to
taste and vanilla.  The original recipe called for three tablespoons of
sugar, but I thought that would be way too sweet once I saw how little
cream I had (maybe the yield varies by can).  Mine was perfect with a
tablespoon and an extra teaspoon of sugar.  Set aside a few tablespoons
of the whipped cream to use as a topping.  Mix in the cocoa to taste (I
used a tablespoon and a half).  Serve the chocolate mousse with the
reserved whipped cream on top.


Filed Under: gluten free, recipe, vegan Tagged With: chocolate, coconut, five ingredients or less

  • « Previous Page
  • 1
  • …
  • 3
  • 4
  • 5

Hi, I’m Becky!

Welcome to A Calculated Whisk, where I share creative paleo and gluten-free recipes. Learn more about me here.

Connect with ACW on social media:

  • Email
  • Facebook
  • Instagram
  • Pinterest
  • RSS
  • Twitter

Looking for something?

Subscribe via email and get a free e-book!

Instant Pot Recipes

Instant Pot Colcannon

Instant Pot Colcannon

Instant Pot Balsamic Short Ribs

Instant Pot Tomato Sauce (made with fresh tomatoes)

Instant Pot Short Rib Ragu

Instant Pot Short Rib Ragu

In a hurry? Try these 30-minute recipes:

Berry Peachy Kale Salad with Candied Pecans

Summer Kale Salad with Peaches and Candied Pecans

Caramelized Salmon with Basil Chile Oil and Quick-Pickled Vegetables (Paleo, Gluten free)

Caramelized Salmon with Basil Chile Oil and Pickled Vegetables

Whole30 Breakfast Nachos (Gluten free, Dairy free, Paleo)

Whole30 Breakfast Nachos

Paleo Potato Hummus with Crudités

my healthy aperture gallery
rodelle brand ambassador

Privacy Policy

All text and photographs (c) Rebecca Winkler 2013-2020 unless otherwise noted.

Copyright 2013-2020 Rebecca Winkler · Foodie Pro Theme by Shay Bocks · Genesis Framework · Powered by Wordpress