A Calculated Whisk

Creative paleo and gluten-free recipes

  • Home
  • About Me
    • Photography Portfolio
  • Cookbook
  • Recipe Index
  • Paleo
    • Paleo Eating
    • A Paleo Pantry
  • Blogging
You are here: Home / Archives for DIY

How to Make Ghee in an Instant Pot (or on the stove!)

January 12, 2018 By Becky 19 Comments

How to Make Ghee (in an Instant Pot or on the stove!)

It’s so easy and quick to make ghee in an Instant Pot (or on the stove), and it’s much more delicious than store-bought! Use your homemade ghee anywhere you’d use butter for more flavor and less lactose.

I’ve been making my own ghee at home for several years now, and it may be my favorite food in the entire world (apologies to macaroni and cheese, my childhood favorite).

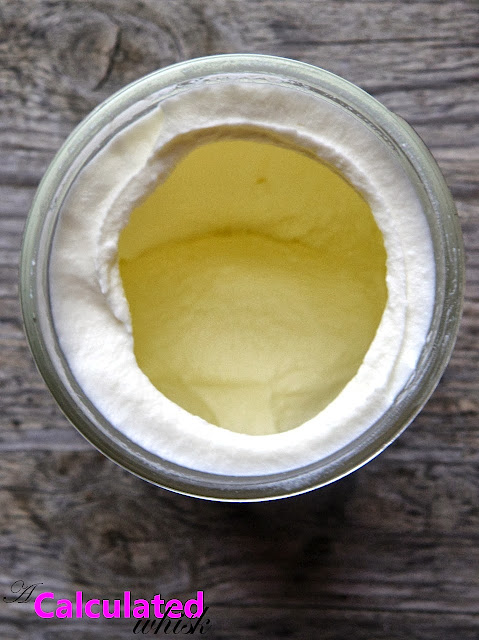
If you’re not familiar with ghee, it’s basically clarified butter taken one delicious step further. When you cook butter and strain out the browned milk solids, the end result is a healthy, lactose-free fat that lasts almost forever and won’t burn at high temperatures the way butter does.

Read More…

Filed Under: gluten free, Instant Pot, paleo, recipe, whole30 Tagged With: butter, DIY, ghee, instant pot, make your own

Salted Pepita Chocolate Bark (Great Gift Idea!)

November 23, 2013 By Becky 2 Comments

Here’s another post with an easy idea for a great gift: salted pepita chocolate bark.  I brought little baggies of this to work last week, and everybody loved them.  My coworkers were convinced that I bought the bark somewhere fancy.  No one needs to know that this gourmet treat takes only minutes to make!  I wrapped mine up in little cellophane treat bags, but you could also pack a bunch up in a nice holiday tin for a more sizeable gift.
If you missed my first post in the great gift ideas series, check it out.  When you’re done making vanilla salt, come back here to read about the bark.  See you in five minutes!
Done?  If not, you can substitute any coarse or flaky sea salt here, but the vanilla salt really takes this over the top.  The pepitas provide a nice crunch and a pop of color, and the combination of vanilla bean, salt, and dark chocolate is absolutely amazing.
I like to make this right before bed, then leave it out to harden while I sleep.  When I wake up in the morning, it’s ready to break into pieces.  Because of this routine, Ben calls this “breakfast chocolate”.  I can assure you, however, that it’s delicious any time of day.  I’m planning on making some more so I can put out a big bowl of it on Thanksgiving, for those of us who like to nibble on something sweet while waiting for the turkey.  Enjoy!

Read More…

Filed Under: gluten free, paleo, recipe, vegan, vegetarian Tagged With: ACW original, candy, chocolate, dairy free, DIY, fall, five ingredients or less, gift, make your own, no-bake, no-cook, pepitas, vanilla salt, winter

Homemade Vanilla Sugar & Vanilla Salt (Great Gift Idea!)

November 22, 2013 By Becky 2 Comments

Do you agree with me and the Barenaked Ladies that vanilla is the finest of the flavors?  If you do, and/or if you remember that song, you should definitely make some vanilla-infused gifts this holiday season.
Vanilla sugar can be used anywhere you would use granulated sugar, but it’s especially wonderful as a finishing sugar, sprinkled on top of cakes, cupcakes, creme brulee, homemade caramels, or ice cream.  You can also put it in your coffee or tea for a delicious touch of creamy sweetness.  Are you sold on vanilla sugar yet?  If not, I’m not sure what to do with you!  You can even make it with coconut sugar for a paleo-friendly vanilla treat.  You know you want to!
If you love sweet and salty flavors together, you will love this vanilla sea salt.  I made mine with Celtic gray coarse sea salt, and it’s strikingly beautiful, fragrant, and complex.  You can sprinkle it on top of any dessert that needs a salty finish (like these cupcakes or these bars), or even try adding it to savory dishes.  I used a bunch in a batch of chocolate bark I made last night, and it was amazing (recipe coming soon)!  Once you make this, you’ll realize that salt and vanilla are meant to be together.  You’ll start wishing all your vanilla were salted, and all your salt vanilla-ed.
I made a bunch of little jars of vanilla sugar to give out as favors to all my friends and family who are coming for Thanksgiving.  I love the idea of giving guests something delicious that they can take home and use for a long time.  Both of these would also make great stocking stuffers, hostess gifts, and wedding favors.  The best part is that they only take about five minutes to make!

Read More…

Filed Under: dessert, gluten free, paleo, vegan, vegetarian Tagged With: baking, dairy free, DIY, gift, holiday, make your own, salt, sugar, vanilla, vanilla salt, vanilla sugar

Make Your Own Butter (plus Maple Spice Compound Butter)

October 12, 2013 By Becky Leave a Comment

When I was in kindergarten, my teacher brought in cream and we all made butter together.  I loved it, and butter-making became a Thanksgiving tradition for me–every year I make my own butter and use a cookie cutter to make it into a turkey shape.  I’ve also made butter with my own students and their families several times, and I’m always surprised at how many parents don’t know that you can easily make your own butter at home with just a jar and some heavy cream.
There is a bit of work involved, since you need to shake the jar like crazy for a while.  It’s easy with a group because you can pass the jar to the next person if you get tired, but I can still get from cream to butter in 15 minutes or less when I’m the only one shaking.
Of course, there is an easier method: pour the cream into a big bowl and beat it with an electric mixer.  However, there’s something really nice about doing it the old-fashioned way.

Read More…

Filed Under: gluten free, recipe, uncategorized, vegetarian Tagged With: butter, cream, DIY, fall, how-to, make your own, maple, pantry essentials, photo tutorial, spice

Strawberry Curd

May 18, 2013 By Becky 10 Comments

Have you made lemon curd yet?  Either way, you’re going to love this sweeter, pinker version.  I’m thinking you could put this on a dutch baby, pipe it inside some cupcakes, spread it on your toast, or drizzle it on some vanilla ice cream.
It’s easy to make, and tastes like spring in a jar!  What are you waiting for?
In case you’re not convinced, here are just a few delicious recipes you’ll be able to make with your strawberry curd:

No-Bake Strawberry Swirl Cheesecake Bars

Double Strawberry Ice Cream
Strawberry Creamsicle Sherbet 
Rest assured that it’s also fabulous just eaten by the spoonful.

Ingredients (adapted from this recipe on Lavender & Lovage; makes about 1 1/2 cups):

1/2 pound organic strawberries, hulled
Zest and juice of one organic orange
2 teaspoons lemon juice
Pinch of salt
1 cup sugar
8 tablespoons butter (1 stick), cubed
4 large eggs

In a food processor, puree the strawberries and orange zest until very smooth.

Heat water to a simmer in a double boiler or a saucepan.  In the top of the double boiler or a heatproof bowl, combine the puree, juices, salt, sugar, and butter.  Place the bowl on top of the pan of simmering water, making sure the bottom of the bowl isn’t actually touching the water.  Beat the eggs and add them to the bowl.  Cook, whisking constantly, until the curd comes together and thickens, about ten minutes.  When the curd is done, it will coat the back of a spoon.

(Full disclosure: my strawberry curd was that grayish-pink color that used to be trendy but was never appetizing.  I added a few drops of red food coloring and one drop of yellow to perk it up.)

Store in sterilized jars in the refrigerator for up to two weeks.

Filed Under: dessert, gluten free, recipe Tagged With: DIY, fruit, make your own, preserves, strawberry, strawberry curd

Make Your Own Vanilla Extract

May 11, 2013 By Becky 2 Comments

Vanilla is such an important ingredient.  It goes into pretty much every dessert I make, and lately I’ve started putting a capful in my morning coffee, too.  Sometimes when I’m baking, the worst thing happens.  I suddenly realize there are only three drops of vanilla left in my little bottle.  This has been happening all too frequently since I developed my vanilla cafe au lait habit, so I decided to put an end to my vanilla extract shortages for good.  I got the idea to make my own vanilla extract from this post on Sunday Morning Banana Pancakes.

All you need are some cute little bottles (I used these), vanilla beans (I got these Madagascar beans), and some vodka.  It doesn’t have to be high quality vodka–the quality of the beans is much more important.  Vanilla beans are expensive, but more reasonable if you buy a bunch of them.  Also, vanilla extract is expensive, so I think if you use enough of it you’ll definitely save money by making your own.  If you don’t want to make all the beans you buy into extract, you can store some in an airtight container to use in baking or custards.  A lot of desserts call for vanilla bean seeds instead of extract, so it’s great to have some around.  As soon as I get my ice cream maker, I am going to use my leftover beans to make vanilla bean ice cream with those great little specks of vanilla seeds in it.

Guess what?  This vanilla extract would make a great gift, and is a gift that keeps on giving.  If you start running low, just top off the vodka and let it sit for a few weeks before using it again.  After doing this a couple of times, you will probably want to add some new beans.  Ina Garten says she’s been doing this to refresh the same bottle of vanilla that’s been in her pantry for twenty years!

Ingredients:

Vanilla beans (6 beans per cup of vodka)
Vodka

Make sure your bottles are really clean.  I sterilized mine by boiling them in water for ten minutes.  Let them dry completely (I put mine in the dishwasher top rack to dry).

Cut each vanilla bean in half lengthwise, and then crosswise to fit in your bottles if you’re using small ones like me.  I used three beans for each of my four-ounce bottles.  Pour in vodka, leaving a little bit of space at the top (if you can find a funnel, you won’t make as much of a mess as I did).  Store in a cool, dark place, and shake every day or so.  The extract will be ready after two months, but continues to develop a more pronounced flavor if aged longer.

I made my labels in Microsoft Word, printed them on regular paper, and stuck them on with a permanent glue stick.  I can’t figure out how to post the document up here for you to download, but if you want these labels, drop me a note with your email address and I’ll send them to you.

Filed Under: uncategorized, vegan, vegetarian Tagged With: DIY, extract, make your own, vanilla

Make Your Own Preserved Lemons

April 27, 2013 By Becky 4 Comments

How gorgeous is all this?  I have never tried preserved lemons, but was inspired by this post to bottle some up right away.  I’m really into lemons right now, and in a month or so, I will have a unique ingredient to use in tagines and other dishes.  Here are some of the recipes I can’t wait to make once my lemons are ready:

 Chicken Tagine with Preserved Lemons and Olives

Preserved Lemon and Chickpea Pasta with Parsley Pesto

Roast Cornish Game Hens with Preserved Lemon and Bay Leaf Butter

Preserved Lemon Semifreddo with Basil Syrup

Fish Tacos with Preserved Lemons

Okay, have I convinced you?  Bonus: preserved lemons are really easy and fun to make.  I made a jar for myself and a jar to give as a gift.  All you need is a jar or two, a bunch of lemons, and some sea salt.

Ingredients (from The Year in Food): 

8-10 organic lemons (depending on how big your jar is)
about 1/2 cup sea salt (I used Maldon)

Start by sterilizing your jars and lids by boiling them in a big pot of water for 10 minutes.  Drain, and make sure the lids are dry.  Wash and dry your lemons well.
Cut half of your lemons into six wedges each (the remaining lemons will be used for juice).  Layer some wedges on the bottom of the jar, then sprinkle generously with salt.  Repeat until you have filled your jar.  Don’t skimp on the salt!  
Roll the other lemons under the palm of your hand so they will release more juice.  Squeeze them into the jar until it’s full.
That’s it!  Store your jar at room temperature, shake it every day or so, and open up the jar every few days to let the lemons breathe.  After a month, the lemons will be ready to use and can be stored in the fridge for a longer shelf life.

Filed Under: recipe, uncategorized Tagged With: condiments, DIY, five ingredients or less, lemon, make your own, preserves

Make Your Own Chocolate Truffles (plus Vegan Coconut Almond Truffles)

April 8, 2013 By Becky Leave a Comment

Chocolate truffles are so easy to make, it’s amazing that places like Godiva get away with charging so much for them.  If you want yours to be even more like the ones at the chocolate shop, you can melt your favorite milk or dark chocolate and dip the chilled truffles in it instead of rolling them in cocoa powder and confectioner’s sugar.  Use a fork to remove the truffle once it’s covered in melted chocolate.  Let the extra drip off, and place the truffle on wax or parchment paper or in a candy cup.   This is a deliciously rich, fancy, no-bake dessert that will impress anyone.  Chocolate truffles also make a great gift wrapped up in a cellophane bag or placed in a decorative box or tin.  This recipe makes about 20 truffles.

Ingredients (adapted from Barefoot in Paris by Ina Garten): 
       ½ cup heavy cream
       3.5 ounces bittersweet chocolate
       3.5 ounces semisweet chocolate
       1 tablespoon brewed coffee
       ½ teaspoon vanilla or other flavoring
       Pinch of salt
       1 tablespoon Grand Marnier or other liqueur of your choosing
       5 ounces melted chocolate for dipping (optional)
       Cocoa and powdered sugar for rolling (optional)
Break the chocolates into small pieces and place in a bowl (don’t use chocolate chips instead of bars, because they have additives you don’t want in this recipe).  Bring the cream to a boil, then quickly pour it through a sieve into the bowl with the chocolate.  Use a whisk to stir until the chocolate is melted and the mixture is smooth.  If your chocolate isn’t quite melted, put the bowl over a pan of simmering water and stir until smooth.
Add the coffee, vanilla or other extract, salt, and liqueur and whisk until smooth.  Chill the mixture for at least 45 minutes, until firm enough to scoop.
When the mixture is firm, use a melon baller or small ice cream scoop to form balls, and place them on a sheet of parchment paper.  Don’t worry if the balls aren’t totally round and smooth; you will have a chance to perfect them later.
Chill the balls for about 15 minutes, then roll them in cocoa and mold them into spheres.  Chill overnight is possible, then roll in powdered sugar before serving.  Or, roll yours in a mix of cocoa and powdered sugar like I did.  Alternately, place in the freezer for about 15 minutes, then dip into a melted chocolate of your choice.


Vegan Coconut Almond Truffles

Ingredients:
       3.5 ounces bittersweet chocolate (check the label to make sure the brand you’re buying doesn’t have any milk products)
       3.5 ounces semisweet chocolate
       ½ cup coconut milk
       ½ teaspoon vanilla
       ½ teaspoon almond extract
       1 tablespoon brewed coffee
       Pinch of salt
       4 tablespoons shredded coconut
       4 tablespoons sliced almonds
Melt the chocolate as described in the recipe above, using coconut milk instead of cream.  Add the extracts, coffee, and salt and whisk to combine.
Grind the coconut and almonds in the food processor until fine.  Stir half of the nut mixture into the chocolate and save the rest for rolling.
Proceed as in the above recipe, chilling the chocolate mixture before forming it into balls.  Instead of cocoa, roll the chocolates in the coconut and almond mixture.

Filed Under: gluten free, recipe, vegan Tagged With: almond, candy, chocolate, coconut, DIY, make your own

Make Your Own Lemon Curd (and welcome to my blog)

March 28, 2013 By Becky Leave a Comment

Hi, I’m Becky and this is my new blog.  The
first recipe I’m going to share with you is for homemade lemon curd.
While you may not think you need to make this unless you’re planning on
hosting a high tea, I’m going to try to convince you that you actually
need to make it right now.  This stuff is ridiculously delicious, plus
easy and fun to make.  I made mine to pipe inside the lemon coconut
cupcakes I’m making for Easter dinner, but I’m worried I might have to
make a second batch.  I’ve been sneaking spoonfuls at every opportunity,
and my boyfriend and I each had a generous dollop on the Dutch babies I
made for breakfast this morning (recipe for that is here).
If you love lemon like I do, you have to try this!  It would be
fabulous on scones.  I’ve never made scones, but will have to try it if I
end up with any lemon curd left at all.

This recipe is adapted from Ina’s, in the Barefoot Contessa cookbook and here.
I reduced the sugar, and think mine has the perfect balance of sweet
and tart flavors.  She says you can make this with oranges or limes
instead of lemons—let me know if you try it!


Ingredients (makes about two cups):

4 lemons, at room temperature

1 cup sugar

4 extra-large eggs, at room temperature

1/4 pound butter (1 stick) at room temperature

Generous pinch of salt


1.   Zest the lemons, avoiding the white
pith underneath the yellow rind (I usually scrape each spot across the
grater twice).  Place the zest in a food processor with the sugar, and
process thoroughly to break the zest up into tiny pieces.

2.   Juice the lemons (roll them under the palm of your hand first so
they’ll release more juice) until you have 1/2 cup of lemon juice.  I
had to use all four lemons to get that much juice.

3.   Cream the butter with the lemon sugar (I used my stand mixer
with the paddle attachment).  Add the eggs one at a time, and then the
lemon juice and salt.  Mix well.

4.   Transfer the mixture to a saucepan.  At this point, it probably
looks like a big mess.  Mine looked like curdled milk.  Maybe lemon curd
is named after its gruesome looks at this stage in the process? Don’t
worry though, your lemon curd will smooth right out as soon as it heats
up.

5.   Cook the lemon curd over low heat, stirring constantly, until it
thickens (10-15 minutes).  I used a thermometer to keep tabs on
things—my lemon curd thickened around 155 degrees, and you don’t want to
let yours get much above 175.

That’s it!  You made lemon curd.  Now, try not to just eat all of it
with a spoon.  I cooled mine and poured it into jars—it will keep for a
couple of weeks in the refrigerator, although I can’t see it ever
lasting that long at my apartment.  Tomorrow I’ll be piping mine into
some springtime coconut cupcakes—I’ll let you know how it goes and share
the recipe soon!

Filed Under: breakfast, recipe Tagged With: DIY, five ingredients or less, lemon, make your own

Hi, I’m Becky!

Welcome to A Calculated Whisk, where I share creative paleo and gluten-free recipes. Learn more about me here.

Connect with ACW on social media:

  • Email
  • Facebook
  • Instagram
  • Pinterest
  • RSS
  • Twitter

Looking for something?

Subscribe via email and get a free e-book!

Instant Pot Recipes

Instant Pot Colcannon

Instant Pot Colcannon

Instant Pot Balsamic Short Ribs

Instant Pot Tomato Sauce (made with fresh tomatoes)

Instant Pot Short Rib Ragu

Instant Pot Short Rib Ragu

In a hurry? Try these 30-minute recipes:

Caprese Frittata

Caprese Frittata

Caramelized Salmon with Basil Chile Oil and Quick-Pickled Vegetables (Paleo, Gluten free)

Caramelized Salmon with Basil Chile Oil and Pickled Vegetables

Grain-free Crepes with Apricot Preserves

Spiced Beef and Sweet Potato Bowls with Crispy Eggs

my healthy aperture gallery
rodelle brand ambassador

Privacy Policy

All text and photographs (c) Rebecca Winkler 2013-2020 unless otherwise noted.

Copyright 2013-2020 Rebecca Winkler · Foodie Pro Theme by Shay Bocks · Genesis Framework · Powered by Wordpress