A Calculated Whisk

Creative paleo and gluten-free recipes

  • Home
  • About Me
    • Photography Portfolio
  • Cookbook
  • Recipe Index
  • Paleo
    • Paleo Eating
    • A Paleo Pantry
  • Blogging

Jerk Chicken with Avocado and Papaya Salad

April 24, 2013 By Becky 6 Comments

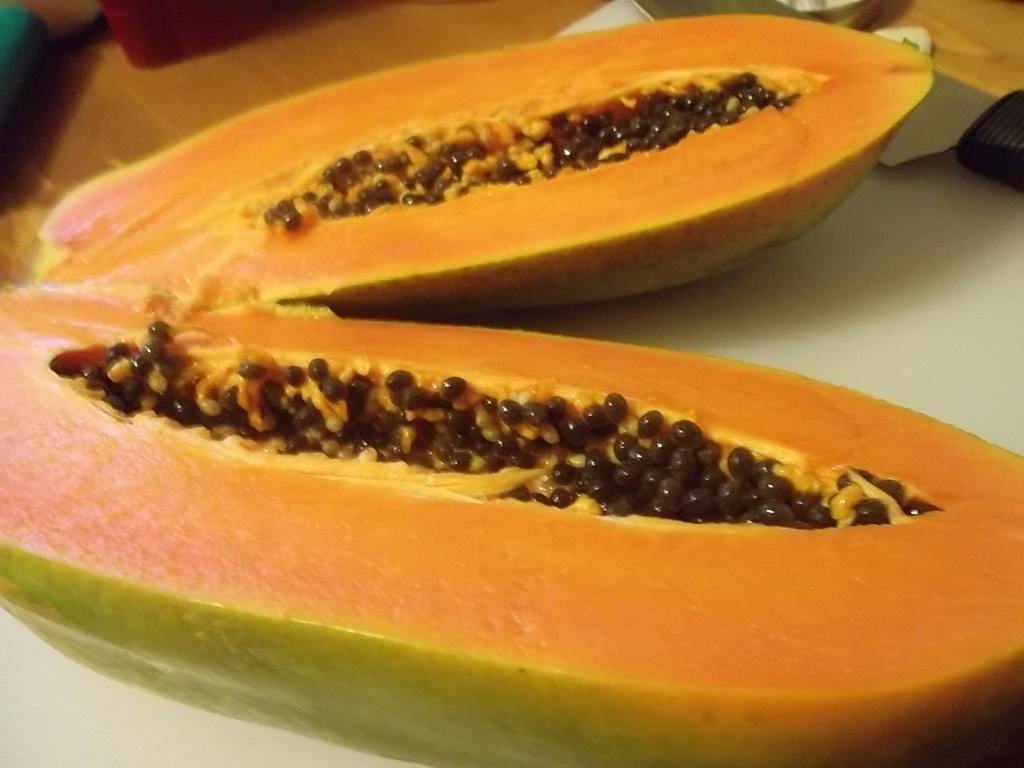
In the Jamaican airport I bought myself a cookbook called Eat Caribbean by Virginia Burke to read on the plane.  It’s fabulous–full of colorful photographs and delicious recipes.  I read the whole thing by the end of the second flight, and already knew I wanted to try jerk chicken right away.  Since Ben and I are trying to eat more lightly for spring, I decided to opt for the recipe with jerk chicken on top of a tropical avocado and papaya salad.  (Have I mentioned how much I love papayas?  If you don’t, or you can’t find one, I bet this would be great with grapefruit, too.)

The jerk seasoning has a lot of ingredients, but is super quick to make.  This recipe makes about 2/3 of a cup, so you can store the extra in your fridge and try it on other meats or seafood.  I am pretty much dying to try jerk everything.  The cookbook even has a recipe for jerk hamburgers!  How fabulous does that sound?

This salad was a wonderful light dinner.  The citrusy dressing, creamy avocado, sweet papaya, and spiced chicken complement each other perfectly.  I will definitely be making this again soon!

This recipe is adapted from Eat Caribbean and serves 3-4.

Ingredients for the jerk seasoning:

6 scallions, trimmed
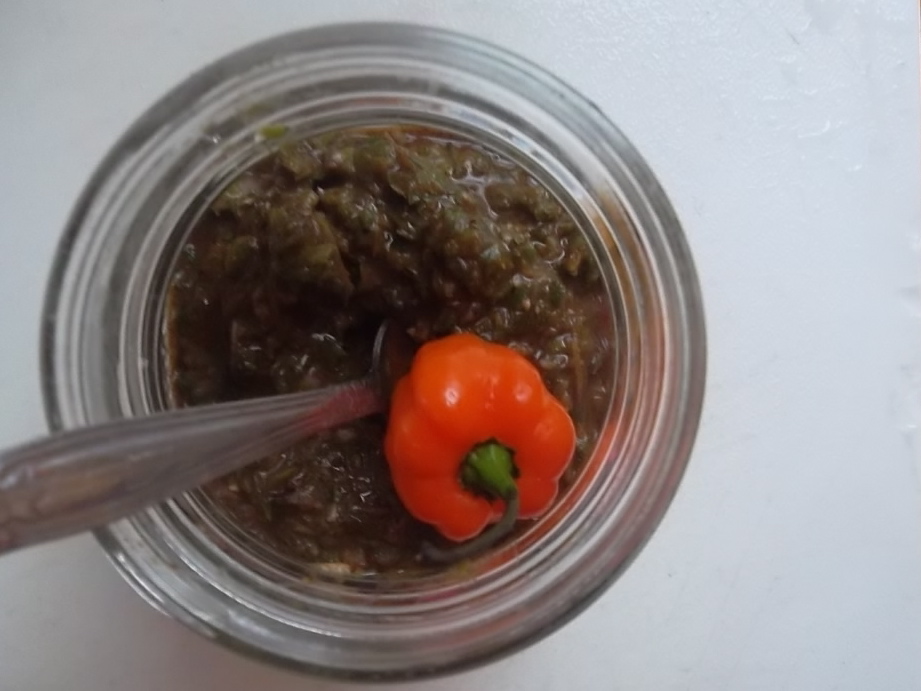
1-3 scotch bonnet or habanero peppers, seeded and trimmed (I chickened out and used half a pepper, and it wasn’t hot at all.  So I recommend using at least one whole pepper!)
1 teaspoon allspice
1 tablespoon chopped fresh thyme or 1/2 tablespoon dried thyme
2 teaspoons cinnamon
1 teaspoon nutmeg
1 teaspoon brown sugar
1 1/2 teaspoons salt
1 teaspoon freshly ground black pepper
1/4 cup cane, malt, or apple cider vinegar
1 tablespoon oil

Blend all ingredients in the food processor to form a paste.  Store in the refrigerator.

Ingredients for the jerk chicken:

8 boneless, skinless chicken thighs (about 1.5 pounds)
Salt or lime juice
1-2 tablespoons jerk seasoning (The recipe called for 1, but I thought the chicken could have used more flavor)
1 tablespoon oil, plus some for cooking

Prepare a bowl of salt water, or water with the juice of 1 lime, and rinse the chicken pieces in it.  Pat dry.  Rub the chicken with the jerk seasoning and oil, and marinate in the refrigerator for at least 2 hours, or overnight.

Heat a bit of oil in a heavy skillet over medium-high heat.  Add the chicken pieces and cook, turning occasionally, until well-browned on both sides and cooked through, about 15 minutes total.

Ingredients for the salad:
1 avocado, cut into small chunks
1/2 papaya, cut into small chunks
8 ounces mixed greens
Ingredients for the lime vinaigrette:
Juice of 1 lime
5 tablespoons olive oil
1 scallion, thinly sliced
Salt and pepper to taste
Combine the ingredients for the dressing in a medium bowl and set aside.  As soon as you cut the avocado, put the pieces in the bowl and toss to coat with the dressing so the avocado doesn’t brown.
To prepare the papaya, slice it in half and scrape out the seeds and fibers with a spoon.  Score the flesh with a knife and scoop out the chunks with a spoon.

To serve, divide the salad greens between the plates.  Top with papaya, avocado, and dressing.  Slice the chicken and place on top.  Drizzle with additional dressing if desired.
Enjoy your healthy dinner.  This would be a good vegetarian option without the chicken!

Filed Under: dinner, recipe, uncategorized Tagged With: avocado, chicken, healthy, papaya, salad

Dirty Banana and More Jamaican Stories

April 18, 2013 By Becky Leave a Comment


Have I ever mentioned how much I love alligators and crocodiles?  Well, I love them a lot.  I’ve seen alligators in Houston’s bayous and on Louisiana swamp tours.  Once I even got to hold a baby alligator at a reptile-themed birthday party.  Yesterday, I got to see crocodiles for the first time in the Black River’s Great Morass!  So much fun.  We went on an hour-long boat tour and saw at least six different crocodiles.  The guides know each of the crocodiles by name–they are very territorial and are always seen in the same spots.  This big guy is named Terrorist.  Yikes!

After the tour, we got to see some more approachable crocs in the crocodile nursery.  But, even that little guy looks like he could give quite a bite.
Here’s what the Great Morass looks like.  All those dangly branches that look like vines are a special kind of root that mangroves send down to help them get more nutrients out of the brackish water.

Next up was the Appleton Estate Rum Tour.  The best part was when they opened up the bar after the tour–we got to serve ourselves shots of as many different kinds of rum as we wanted.  My favorite was the rum cream, which is featured in my new favorite Jamaican cocktail (see recipe below).  It’s like a better version of Bailey’s.  I also liked the Berry Hill Pimento Allspice liqueur, which has a pleasant double burn from the alcohol and spice.

I bought an adorable mini-bundt rum cake at the Appleton gift shop, which was a deliciously buttery, rum-soaked cake.  My mom has a mini bundt pan, so I am totally planning on making my own version when I get home.  Maybe with a glaze involving rum cream?  I love that stuff.

Caves at Xtabi

So, yesterday was jam-packed with tours, and today we decided to just take it easy by the cliffs.  We walked about 15 minutes down the road from our hotel to Xtabi, a resort that we’d heard serves great breakfast.  We could smell delicious baked goods even before we rounded the corner and saw the place.  Right away, we knew we just wanted to spend the entire day there.  The tables for the restaurant are in a large round gazebo and porch perched on the cliffs overlooking the ocean.  Two sets of stairs lead down to the lagoon, where you can swim or catch a ride on a glass-bottom boat.  Another set of stairs lead to the caves, where stone benches invite you to sit and relax in the dark coolness by the grotto.  I, however, left in a bit of a hurry after a couple of bats zoomed by uncomfortably close to my head.

Turns out the food is just as fabulous as the surroundings.  I ordered the bread basket (hello, carbs do not count when you’re on vacation).  It came with a corn muffin, banana bread, and a cinnamon roll, all split open, buttered, and grilled to crispy perfection.  Ben ordered an ackee and callaloo omelette, which featured ackee from the tree right outside.  It was also delicious, but I did not get a chance to snap a picture before he started eating (I guess it’s kind of annoying if someone is always trying to photograph your food from a few different angles before you can even get a bite in).

We lounged by the cliffs all morning, watching small rainstorms come and go.  When it got to be a respectable hour (ahem, 11:30 am), we ordered drinks.  I got one called a Dirty Banana–I was sold by the name and the fact that it had rum cream in it.  This is my new favorite cocktail!  I’m sharing a recipe here based on the ingredients Xtabi uses, so you can try it right away.  You might have to tweak some of the quantities to get it just how you like it.  Let me know what you think!

Recipe (serves one):

2 ounces Tia Maria
2 ounces rum cream or Bailey’s
1 banana
1 scoop vanilla ice cream
Chocolate syrup

Drizzle chocolate syrup all over the inside of a tall, frosted glass.  Blend the remaining ingredients until smooth.  Serve in the chocolaty glass.  If you want it extra boozy, top with another splash of Tia Maria.  Enjoy!

Filed Under: drinks, recipe, restaurants, travel, uncategorized Tagged With: banana, cocktails, five ingredients or less, Jamaica

Jamaica–No problem!

April 17, 2013 By Becky 2 Comments

A woman selling fruit on Negril Beach

We got into Jamaica yesterday afternoon.  It took a while to get to our hotel in Negril.  We took a shuttle that drops people off at several different hotels, and ours was last.  Our bus driver, Bob, told us sometimes Americans find it scary riding on the left side of the road, and told us that if it we got scared, to just close our eyes and say, “No problem.”

Well, that is the theme here.  We went to the beach today and sat down at a seaside bar.  Ben asked the bartender what mixed drink she would recommend, and she said she liked one called “No problem” that wasn’t on the menu.  I ordered it–no problem.  It was a mix of rum cream, coconut rum, and pineapple juice.  Delicious!

Last night we had dinner at our hotel.  We both ordered the special, which was a stuffed chicken breast.  It was excellent!  The chicken was filled with vegetables, beans, and sausage, rolled up and grilled, and topped with a savory creole-style sauce.  The chef came out to see how our meals had been, and I asked him for the recipe.  He said he would get me a copy, so we’ll see!  If he does I promise I’ll share it with you.  We finished our dinner with a scoop of ice cream with Bailey’s poured on top.

Stuffed Grilled Chicken

Today for lunch we went to a place called Cosmo’s right on the beach that’s famous for its seafood.  I got a perfectly spicy conch curry with festivals, which are slightly sweet, doughy fried dumplings.  Delicious again.  So far I have loved everything I’ve eaten (and drank) in this country.

Conch Curry with Festival

Tonight we decided to walk from our hotel to one of the nearby restaurants.  We walked a block down to the corner, and saw a tiny place called Erica’s Cafe.  It was basically a one-room shack with an big front porch.  Out front a few guys were sitting around a Weber grill with a big soup pot sitting on top.  Making conch soup on the barbecue, turns out.  No problem!

We were won over by the super friendly owner and decided to stay for dinner.  The guys out front convinced us to start by trying the conch soup, which was a richly flavored deep orange brew served in Styrofoam coffee cups.  It had big pieces of conch, potato, yam, another vegetable like a potato but with a mouthier feel, carrots, and black beans.
The menu said “best lobster in town”, so I decided to try it.  I got two meaty lobster tails in a buttery sauce with onions and garlic, a bunch of surprisingly delicious (mayonnaise-free!) cole slaw, and rice and peas (rice and peas is Jamaican for rice and beans).  Everything was fabulous and the flavors went together so well, especially washed down with a Red Stripe.  

The cole slaw was so fresh and yummy.  I usually hate cole slaw, because I hate mayonnaise.  This slaw looked almost naked, and had shreds of carrot and cucumber in addition to cabbage.  I asked the owner what they dressed it with, and he told me vinegar and lots of sugar!  Something else to try at home.  
The other guys who were at the restaurant had all these small, green, kiwi-sized fruits.  When I asked what they were, they said mangoes!  I didn’t know mangoes could be so small.  We got to see the tree out back, and they gave us three mangoes to take with us.  The instructions were: wait until tomorrow, wash them, and eat the whole thing (skin and all!).  I’ll let you know how it goes.  No problem!
Mini mangoes

Filed Under: restaurants, travel, uncategorized Tagged With: Jamaica

Strawberry Moscato Fool

April 11, 2013 By Becky 2 Comments

So, these pictures do not really convey how fresh and delicious this dessert was.  It’s even almost healthy, because it has no sugar and is half fruit.  It has a splash of wine, which is great for your heart.  Also, it is fast and easy to make.  A FOOL could make this!  And, you would be a fool not to.

Ingredients (serves 2):

1 cup strawberries (I used frozen and didn’t have time to defrost, so I popped them in the microwave)
1 teaspoon Stevia powder
1 1/2 tablespoons red Moscato
1 teaspoon vanilla
1 cup heavy cream

Blend the first four ingredients and set aside.  Whip the cream using a mixer until it holds stiff peaks.  Fold about half of the strawberry puree, or whatever amount you prefer, into the whipped cream.  Serve with additional strawberry puree on top.

I tried to make a marbled design on top of mine, and it looked slightly better than this in real life.

So, have you ever made a fool?  What kinds of fruit have you tried?  I am totally into this because it’s the easiest dessert ever and I love to whip cream.  Maybe I’ll try it with whipped coconut cream next time.

Filed Under: gluten free, recipe Tagged With: fool, strawberry

Make Your Own Chocolate Truffles (plus Vegan Coconut Almond Truffles)

April 8, 2013 By Becky Leave a Comment

Chocolate truffles are so easy to make, it’s amazing that places like Godiva get away with charging so much for them.  If you want yours to be even more like the ones at the chocolate shop, you can melt your favorite milk or dark chocolate and dip the chilled truffles in it instead of rolling them in cocoa powder and confectioner’s sugar.  Use a fork to remove the truffle once it’s covered in melted chocolate.  Let the extra drip off, and place the truffle on wax or parchment paper or in a candy cup.   This is a deliciously rich, fancy, no-bake dessert that will impress anyone.  Chocolate truffles also make a great gift wrapped up in a cellophane bag or placed in a decorative box or tin.  This recipe makes about 20 truffles.

Ingredients (adapted from Barefoot in Paris by Ina Garten): 
       ½ cup heavy cream
       3.5 ounces bittersweet chocolate
       3.5 ounces semisweet chocolate
       1 tablespoon brewed coffee
       ½ teaspoon vanilla or other flavoring
       Pinch of salt
       1 tablespoon Grand Marnier or other liqueur of your choosing
       5 ounces melted chocolate for dipping (optional)
       Cocoa and powdered sugar for rolling (optional)
Break the chocolates into small pieces and place in a bowl (don’t use chocolate chips instead of bars, because they have additives you don’t want in this recipe).  Bring the cream to a boil, then quickly pour it through a sieve into the bowl with the chocolate.  Use a whisk to stir until the chocolate is melted and the mixture is smooth.  If your chocolate isn’t quite melted, put the bowl over a pan of simmering water and stir until smooth.
Add the coffee, vanilla or other extract, salt, and liqueur and whisk until smooth.  Chill the mixture for at least 45 minutes, until firm enough to scoop.
When the mixture is firm, use a melon baller or small ice cream scoop to form balls, and place them on a sheet of parchment paper.  Don’t worry if the balls aren’t totally round and smooth; you will have a chance to perfect them later.
Chill the balls for about 15 minutes, then roll them in cocoa and mold them into spheres.  Chill overnight is possible, then roll in powdered sugar before serving.  Or, roll yours in a mix of cocoa and powdered sugar like I did.  Alternately, place in the freezer for about 15 minutes, then dip into a melted chocolate of your choice.


Vegan Coconut Almond Truffles

Ingredients:
       3.5 ounces bittersweet chocolate (check the label to make sure the brand you’re buying doesn’t have any milk products)
       3.5 ounces semisweet chocolate
       ½ cup coconut milk
       ½ teaspoon vanilla
       ½ teaspoon almond extract
       1 tablespoon brewed coffee
       Pinch of salt
       4 tablespoons shredded coconut
       4 tablespoons sliced almonds
Melt the chocolate as described in the recipe above, using coconut milk instead of cream.  Add the extracts, coffee, and salt and whisk to combine.
Grind the coconut and almonds in the food processor until fine.  Stir half of the nut mixture into the chocolate and save the rest for rolling.
Proceed as in the above recipe, chilling the chocolate mixture before forming it into balls.  Instead of cocoa, roll the chocolates in the coconut and almond mixture.

Filed Under: gluten free, recipe, vegan Tagged With: almond, candy, chocolate, coconut, DIY, make your own

Spinach and Parmesan Soufflé

April 6, 2013 By Becky 2 Comments

This is my first attempt at making soufflé.  I like to cook breakfast pretty much every weekend morning, and was in the mood for blueberry muffins. Unfortunately, I was out of frozen blueberries and too lazy to go to the store.  I had baby spinach, lots of eggs, and a hunk of Parmigiano Reggiano.  Also, I had two four-cup soufflé dishes that had only held lemon mousse so far.  Right now, they’re living up to their name since they’re filled with spinach parmesan soufflé.  This recipe is adapted from Bon Appétit.

I was so paranoid that the soufflés would fall that I started snapping pictures while they were still in the oven.  But, they actually held up really well!
Ingredients (serves 2-3):
1 1/2 cups freshly grated Parmigiano Reggiano cheese
2 tablespoons butter, plus extra for greasing dishes
6 tablespoons flour
1 1/4 cup buttermilk
3 cups baby spinach
6 egg yolks
8 egg whites, at room temperature
1 teaspoon lemon juice (optional)
Salt and pepper to taste
Pinch of nutmeg (optional)
Preheat the oven to 375.  Place two four-cup soufflé dishes (or eight one-cup dishes for mini soufflés) on a cookie sheet.  Grease the bottom and sides of the dishes with butter.
Melt the butter over medium heat.  Add the flour and whisk for a minute.  Add the buttermilk and whisk until combined and almost smooth.  Add the spinach, parmesan cheese, egg yolks, salt, pepper, and nutmeg.  Stir to combine and remove from the heat.  
In a non-reactive bowl, place the room-temperature egg whites and lemon juice, if using (this just makes it a little easier to whip the whites).  Beat until the whites hold medium peaks.
Fold the egg whites into the other mixture a little bit at a time.  Divide mixture among the dishes, and bake for 30 minutes for one-cup dishes or 40 minutes for four-cup dishes, or until puffy and golden brown.  Serve immediately.

Filed Under: uncategorized Tagged With: baking, cheese, eggs, soufflé, spinach

Chocolate Mousse with a Secret Ingredient

April 5, 2013 By Becky 2 Comments

Here it is…another fabulous vegan dessert!  You
have to try this.  It’s easier than easy, and super delicious.  No
cooking is involved, and it comes together in less than five minutes.

So, I told you it’s vegan.  Can you guess what
the secret ingredient is? I will give you one hint: it’s not avocado
(although I have been wanting to try this recipe for chocolate avocado pudding).

Here’s a picture of the process:

Have you figured it out?  It’s coconut cream!
 Isn’t that crazy?  Maybe you already knew about this whipped coconut
cream miracle, but I had no idea until I saw this photo tutorial
the other day. Today after dinner (I tried to make shrimp korma—it was
pretty good but I want to tweak the recipe before I share it with you) I
had an extra can of coconut milk and a hankering to try it.  But, I
felt like it would be lame to just make and eat a bowl of whipped
coconut cream.  So, I searched for a dessert featuring this amazing
stuff, and found and adapted this recipe from
Baking Chic.  If you have a can of coconut milk, go put it in the
refrigerator right now so you can make this tomorrow.  If you don’t have
a can of coconut milk, go out and buy one, then put it in the
refrigerator so you can make this tomorrow.  If you’re in a big hurry,
put your can in the freezer so you can make this in half an hour.

Ingredients (serves one):

Cream from one can of coconut milk, chilled
1-3 tablespoons cocoa, to taste
1-3 tablespoons sugar, to taste
1/2 teaspoon vanilla

Open the can of coconut milk, and spoon the hardened cream off the
top.  Save the liquid for something else, like a smoothie.  Using an
electric mixer, whip the coconut cream until fluffy.  Mix in sugar to
taste and vanilla.  The original recipe called for three tablespoons of
sugar, but I thought that would be way too sweet once I saw how little
cream I had (maybe the yield varies by can).  Mine was perfect with a
tablespoon and an extra teaspoon of sugar.  Set aside a few tablespoons
of the whipped cream to use as a topping.  Mix in the cocoa to taste (I
used a tablespoon and a half).  Serve the chocolate mousse with the
reserved whipped cream on top.


Filed Under: gluten free, recipe, vegan Tagged With: chocolate, coconut, five ingredients or less

Lemon Coconut Cupcakes

March 31, 2013 By Becky Leave a Comment


I love cupcakes!  I love them so much that I
named a kitten after them (she was the size of a cupcake when I found
her, so it totally makes sense).  To go with my lemon kick, I decided to
create these lemon coconut cupcakes.  The bird’s nest idea comes from
Martha and can be found here, and the recipe is inspired by Ina’s in the Barefoot Contessa cookbook and Gaby’s found here.
 I know this may not be getting out there in time to be part of your
Easter dinner, but with regular decorating these could be enjoyed
anytime.


Ingredients (makes 18 cupcakes):

1/2 lb butter (2 sticks) at room temperature
1 3/4 cups sugar
2 1/2 cups flour
1 teaspoon lemon zest
3 teaspoons lemon juice
5 eggs at room temperature
1 teaspoon baking powder
1/2 teaspoon baking soda
1/2 teaspoon salt
1 cup coconut milk
3/4 cup sweetened shredded coconut 

Lemony Cream Cheese Frosting (makes enough for 18 cupcakes):

1/2 cup plus 3 tablespoons unsalted butter, at room temp
8 oz. Neufchatel cheese (or cream cheese), at room temp
Zest of one lemon
1/8 tsp. almond extract
1/4 tsp. vanilla extract
1 1/2 cups powdered sugar

To fill and decorate: 

1 cup lemon curd(about half a recipe)

1 cup toasted sweetened shredded coconut

1 recipe cream cheese frosting

Cadbury mini eggs or other candy eggs

To make the cupcakes:

1.  Preheat the oven to 325.  Cream the butter and sugar in an stand
mixer fitted with the paddle attachment.  With the mixer on low, add the
eggs one at a time, then add the lemon zest and juice.
2.   Sift together the flour, baking soda, baking powder, and salt.
3.   Add the dry ingredients to to the mixer in three parts, alternating with the coconut milk, and mix just until combined.
4.   Fold in the coconut.
5.   Divide the batter among the cupcake cups, and bake for 20-25 minutes or until a toothpick comes out clean.

To make the frosting:
Cream the softened butter and cream cheese together.  Sift in the powdered sugar.  Add the lemon zest and extracts and mix well.

To fill and decorate:

When the cupcakes are done, cool them completely.  Use a paring knife
to cut a cone-shaped piece out of the top of each cupcake, making sure
not to cut all the way down to the bottom.  Use a small spoon to fill
the empty cones with lemon curd (and have fun eating the little
cone-shaped pieces of cake!  No one is going to miss those!).

Transfer the frosting to a large ziploc bag, and cut off the tip of one corner to make a dime-sized hole.  Pipe a circle of frosting onto the outer edge of each cupcake.  Sprinkle toasted coconut on top to cover.  (To toast coconut, cook it in a dry skillet over medium-low heat until golden brown, about 8 minutes.  Don’t turn your back on it because it burns easily.)   Then, place 3 Cadbury mini eggs in the middle of each nest.

Filed Under: uncategorized Tagged With: baking, coconut, cupcakes, Easter, lemon

Make Your Own Lemon Curd (and welcome to my blog)

March 28, 2013 By Becky Leave a Comment

Hi, I’m Becky and this is my new blog.  The
first recipe I’m going to share with you is for homemade lemon curd.
While you may not think you need to make this unless you’re planning on
hosting a high tea, I’m going to try to convince you that you actually
need to make it right now.  This stuff is ridiculously delicious, plus
easy and fun to make.  I made mine to pipe inside the lemon coconut
cupcakes I’m making for Easter dinner, but I’m worried I might have to
make a second batch.  I’ve been sneaking spoonfuls at every opportunity,
and my boyfriend and I each had a generous dollop on the Dutch babies I
made for breakfast this morning (recipe for that is here).
If you love lemon like I do, you have to try this!  It would be
fabulous on scones.  I’ve never made scones, but will have to try it if I
end up with any lemon curd left at all.

This recipe is adapted from Ina’s, in the Barefoot Contessa cookbook and here.
I reduced the sugar, and think mine has the perfect balance of sweet
and tart flavors.  She says you can make this with oranges or limes
instead of lemons—let me know if you try it!


Ingredients (makes about two cups):

4 lemons, at room temperature

1 cup sugar

4 extra-large eggs, at room temperature

1/4 pound butter (1 stick) at room temperature

Generous pinch of salt


1.   Zest the lemons, avoiding the white
pith underneath the yellow rind (I usually scrape each spot across the
grater twice).  Place the zest in a food processor with the sugar, and
process thoroughly to break the zest up into tiny pieces.

2.   Juice the lemons (roll them under the palm of your hand first so
they’ll release more juice) until you have 1/2 cup of lemon juice.  I
had to use all four lemons to get that much juice.

3.   Cream the butter with the lemon sugar (I used my stand mixer
with the paddle attachment).  Add the eggs one at a time, and then the
lemon juice and salt.  Mix well.

4.   Transfer the mixture to a saucepan.  At this point, it probably
looks like a big mess.  Mine looked like curdled milk.  Maybe lemon curd
is named after its gruesome looks at this stage in the process? Don’t
worry though, your lemon curd will smooth right out as soon as it heats
up.

5.   Cook the lemon curd over low heat, stirring constantly, until it
thickens (10-15 minutes).  I used a thermometer to keep tabs on
things—my lemon curd thickened around 155 degrees, and you don’t want to
let yours get much above 175.

That’s it!  You made lemon curd.  Now, try not to just eat all of it
with a spoon.  I cooled mine and poured it into jars—it will keep for a
couple of weeks in the refrigerator, although I can’t see it ever
lasting that long at my apartment.  Tomorrow I’ll be piping mine into
some springtime coconut cupcakes—I’ll let you know how it goes and share
the recipe soon!

Filed Under: breakfast, recipe Tagged With: DIY, five ingredients or less, lemon, make your own

  • « Previous Page
  • 1
  • …
  • 32
  • 33
  • 34

Hi, I’m Becky!

Welcome to A Calculated Whisk, where I share creative paleo and gluten-free recipes. Learn more about me here.

Connect with ACW on social media:

  • Email
  • Facebook
  • Instagram
  • Pinterest
  • RSS
  • Twitter

Looking for something?

Subscribe via email and get a free e-book!

Instant Pot Recipes

Instant Pot Colcannon

Instant Pot Colcannon

Instant Pot Balsamic Short Ribs

Instant Pot Tomato Sauce (made with fresh tomatoes)

Instant Pot Short Rib Ragu

Instant Pot Short Rib Ragu

In a hurry? Try these 30-minute recipes:

Berry Peachy Kale Salad with Candied Pecans

Summer Kale Salad with Peaches and Candied Pecans

Blistered Okra with Garlic and Cumin

Instant Pot Potato Leek Soup with Cauliflower

Whole30 Breakfast Nachos (Gluten free, Dairy free, Paleo)

Whole30 Breakfast Nachos

my healthy aperture gallery
rodelle brand ambassador

Privacy Policy

All text and photographs (c) Rebecca Winkler 2013-2020 unless otherwise noted.

Copyright 2013-2020 Rebecca Winkler · Foodie Pro Theme by Shay Bocks · Genesis Framework · Powered by Wordpress