A Calculated Whisk

Creative paleo and gluten-free recipes

  • Home
  • About Me
    • Photography Portfolio
  • Cookbook
  • Recipe Index
  • Paleo
    • Paleo Eating
    • A Paleo Pantry
  • Blogging
You are here: Home / Archives for Becky

Salted Caramel Cupcakes

June 21, 2013 By Becky 16 Comments


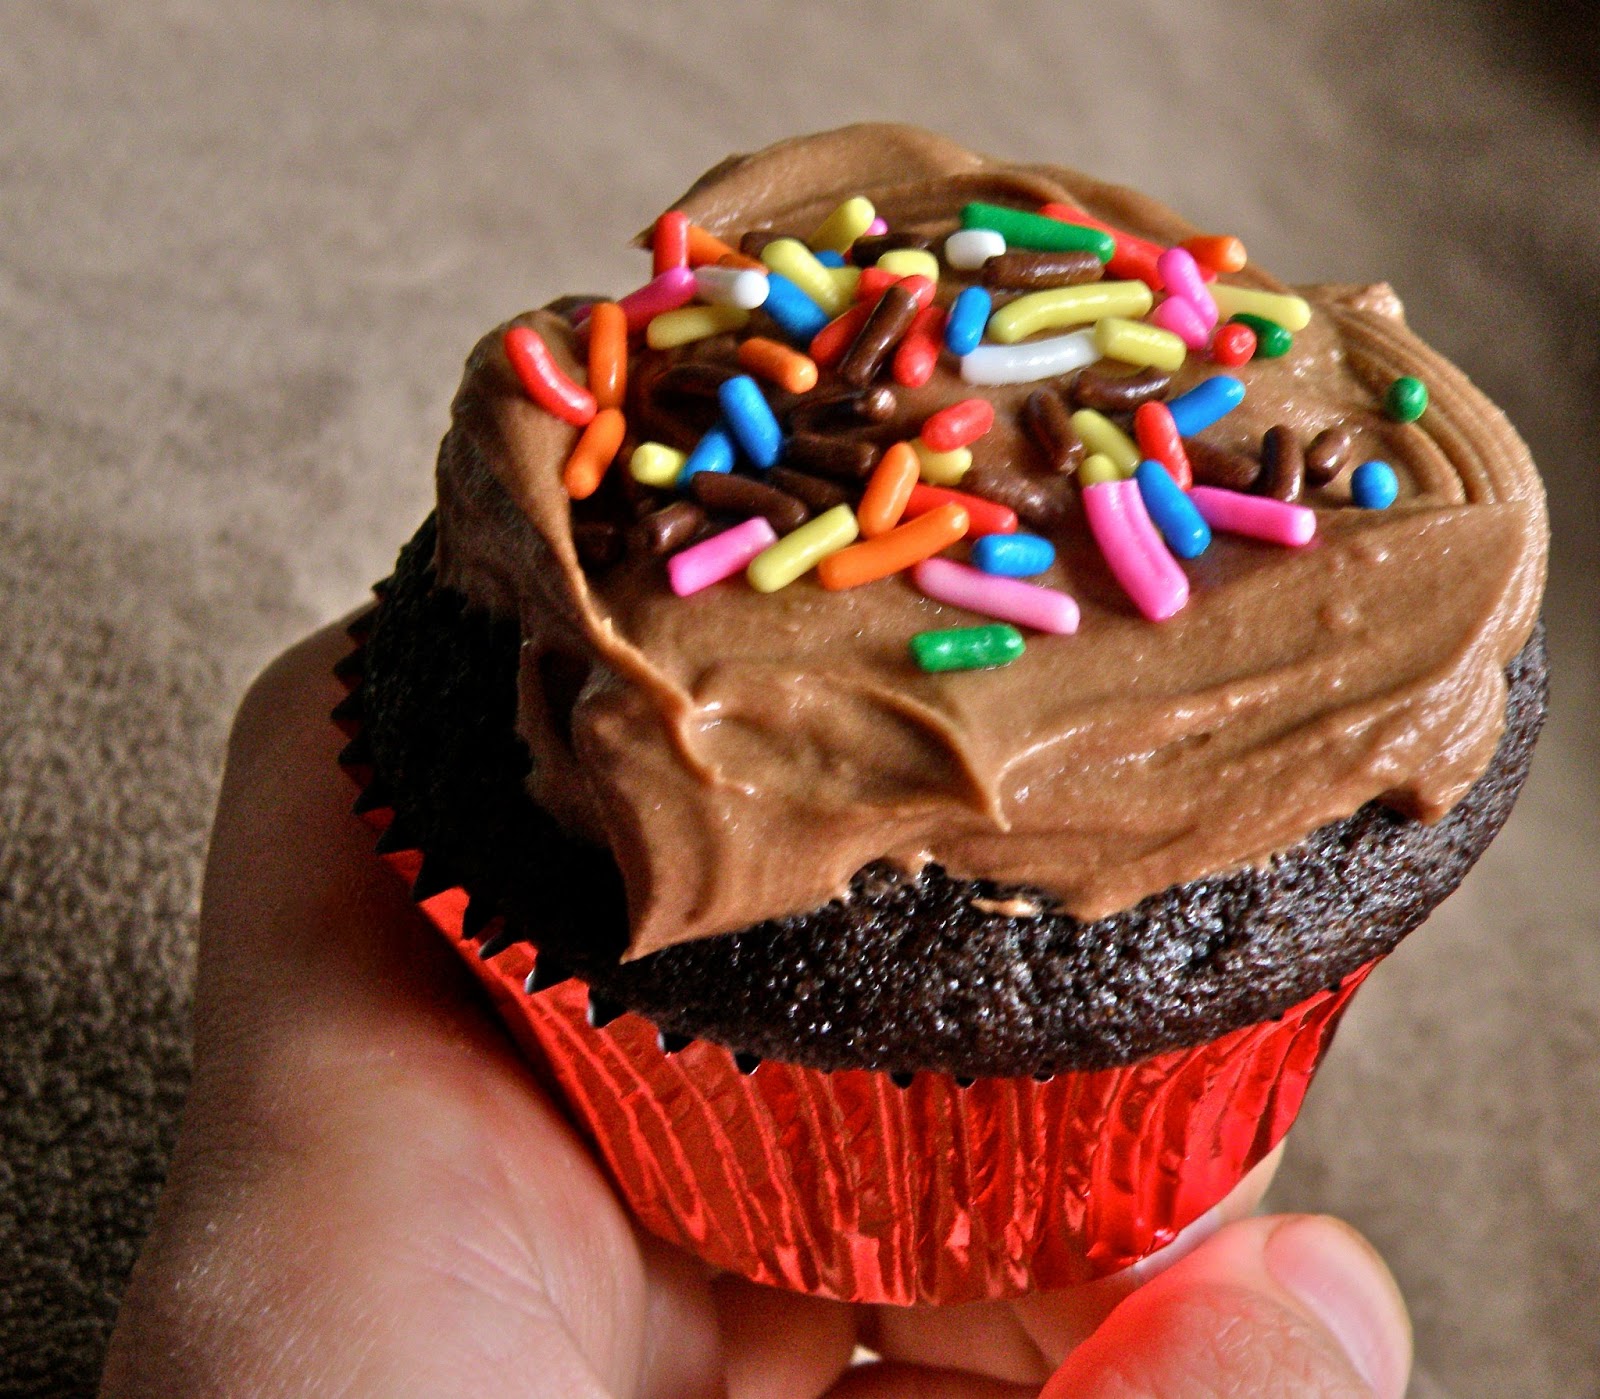
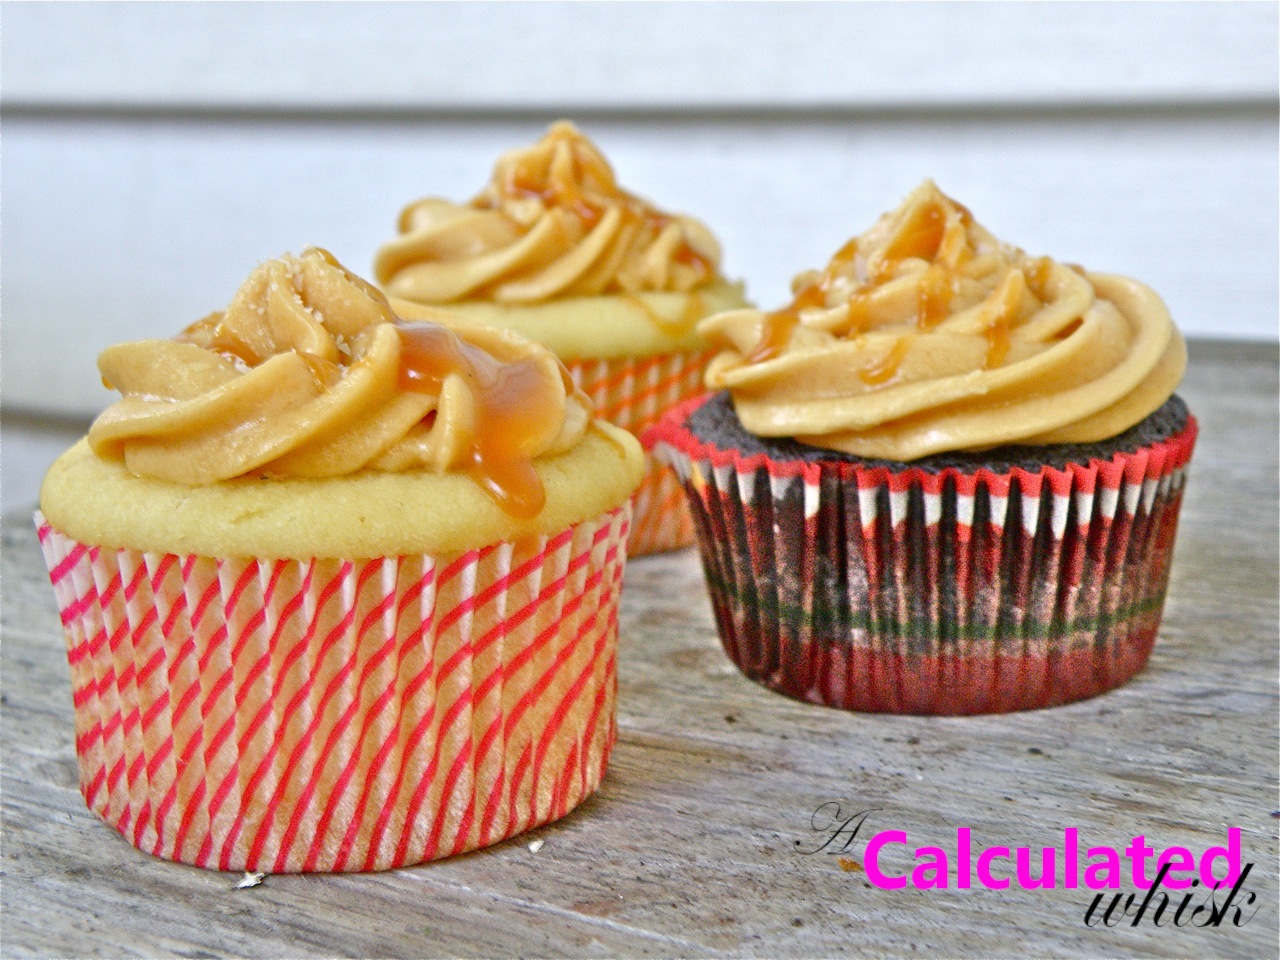
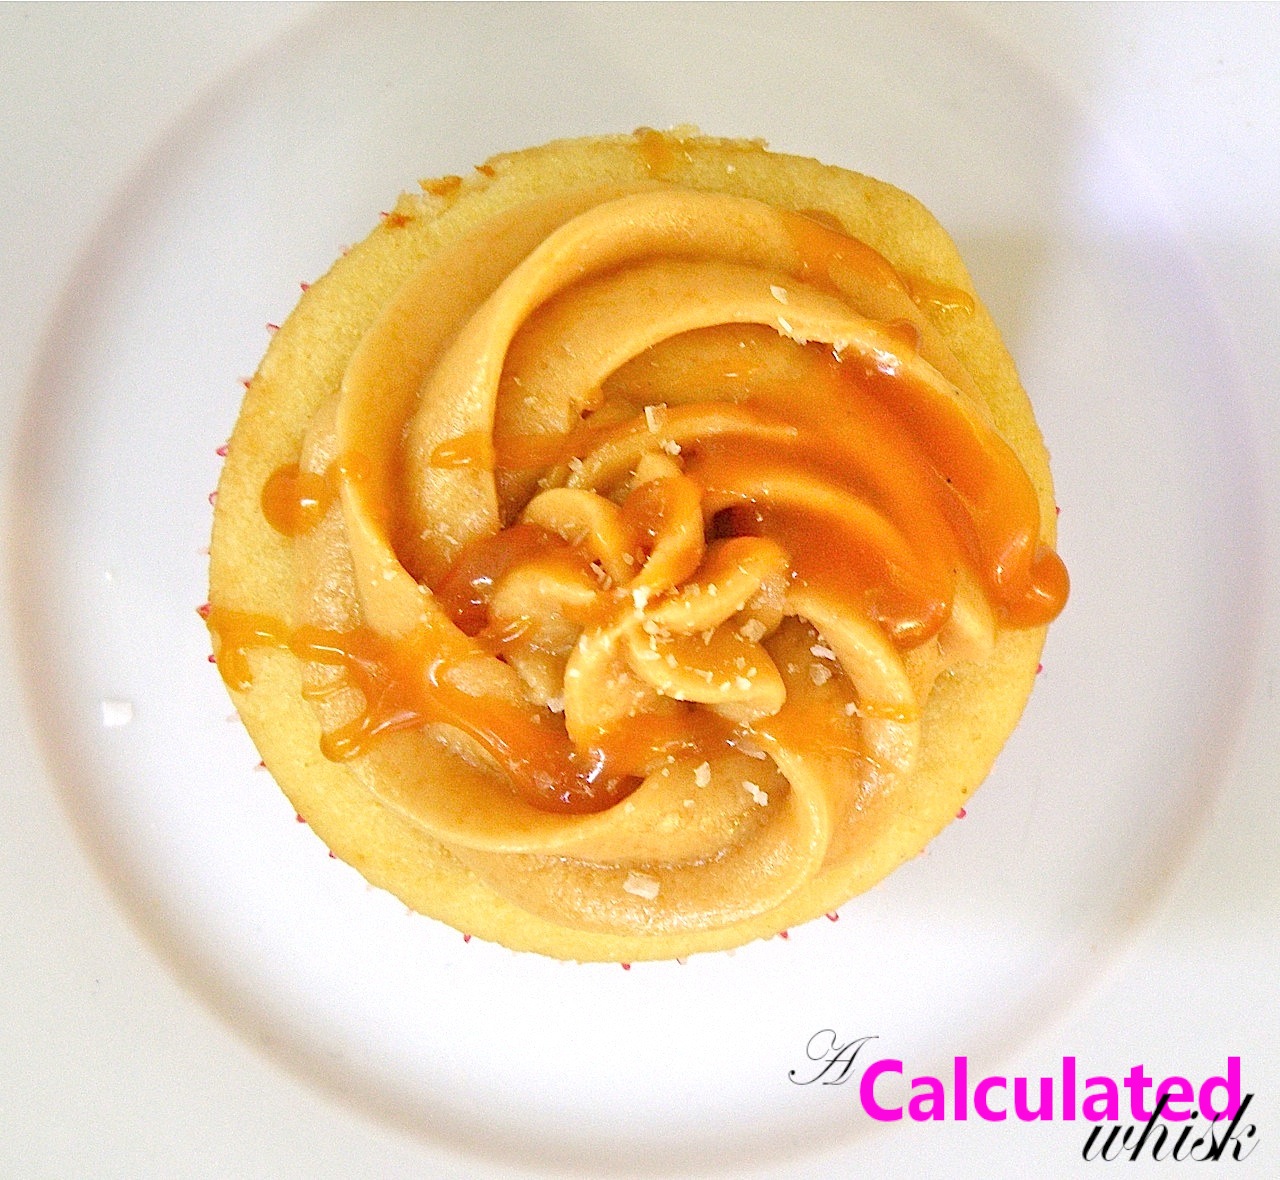
Okay, this is it!  My best cupcake ever.  If you haven’t jumped onto the salted caramel train yet, now is the time.  These are light and delicious vanilla cupcakes (my new favorite white cake recipe) filled with salted caramel sauce, topped with salted caramel buttercream, and sprinkled with a little more sea salt to finish.  They’re amazing!  I recommend that you make them right now.  If you prefer, you can use chocolate cupcakes as the base–I tried that, too, and it’s also amazing.


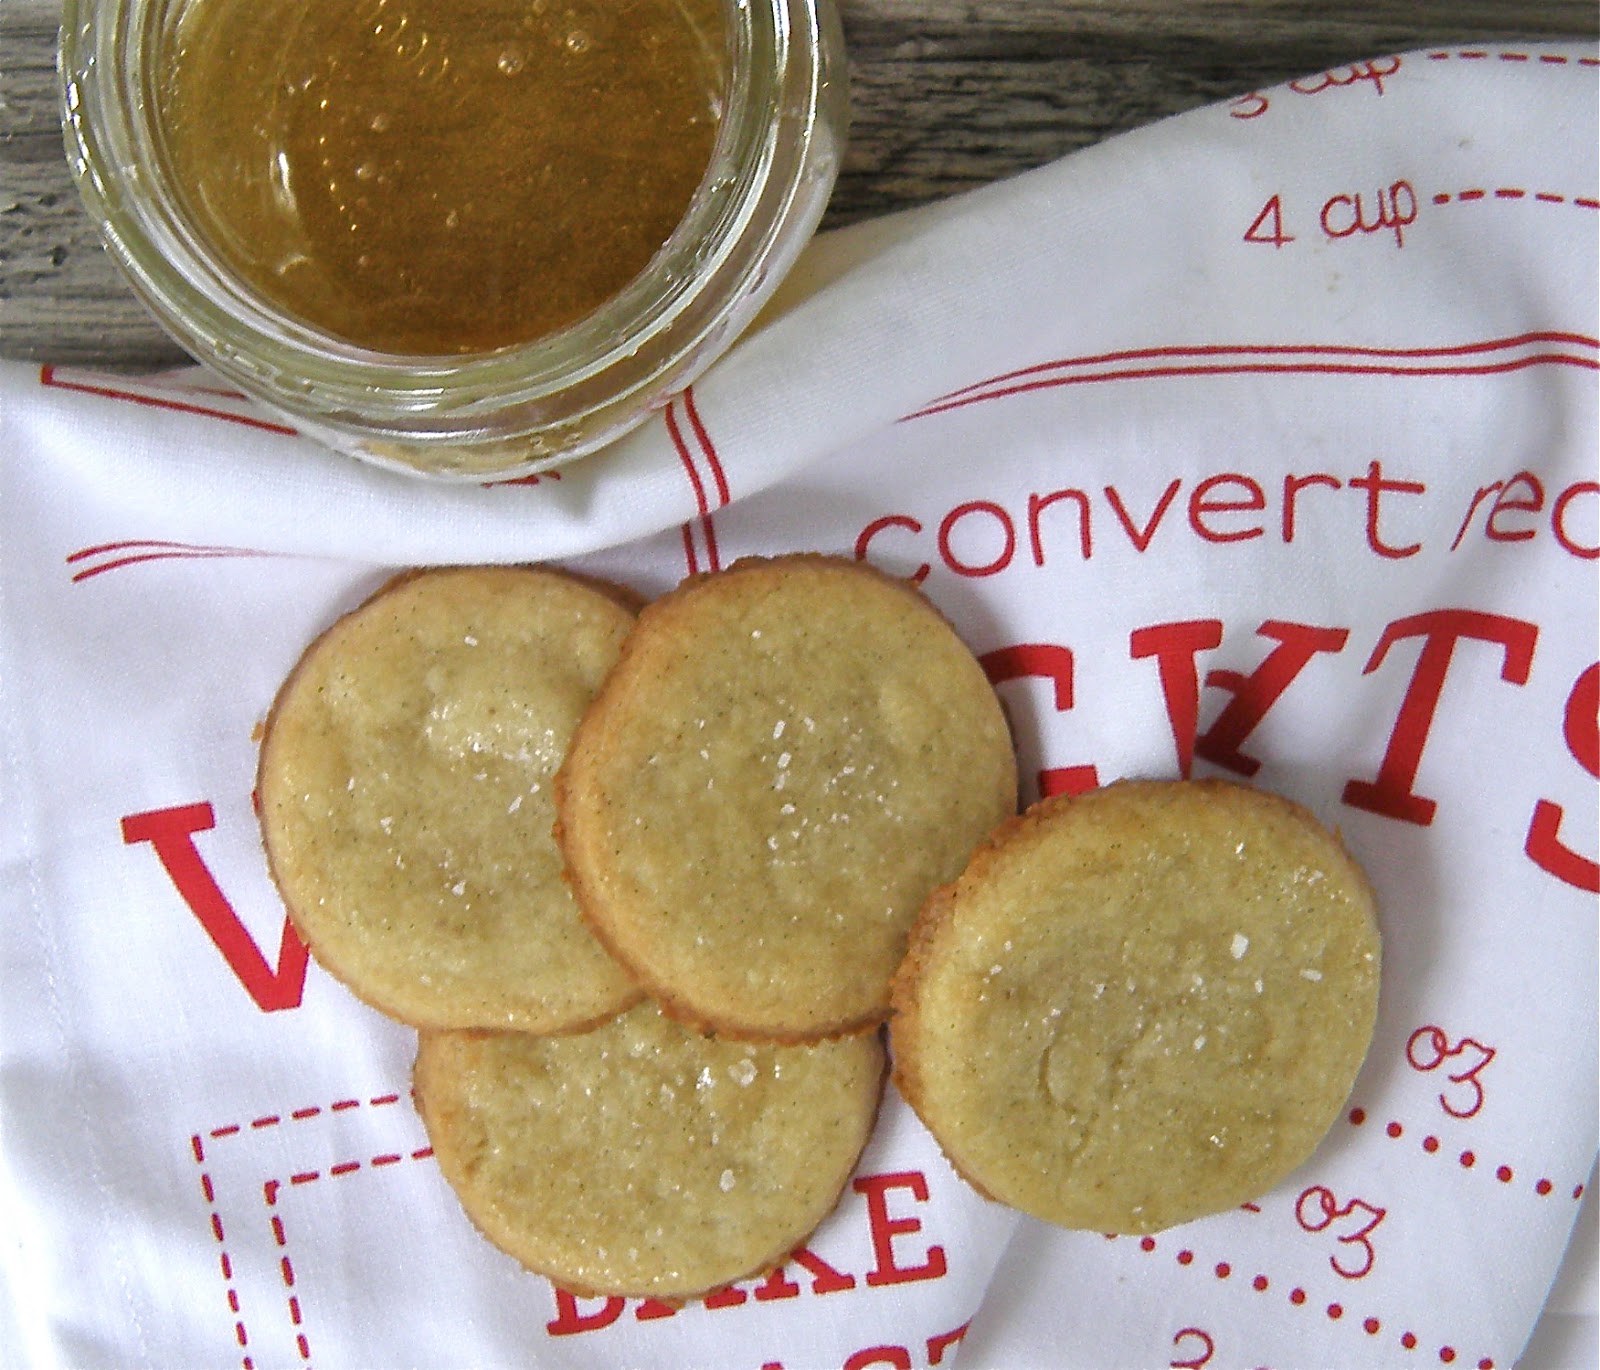
To make these, you’ll need to some salted caramel sauce.  You might want to make a double recipe so you can stash some in the fridge or drizzle it over ice cream.  If you make a single recipe, it should be just enough to fill the cupcakes and make the frosting.

You’ll also need cake flour.  I know, I also wish all-purpose flour could really be used for all purposes, but this time you’re going to need the cake flour.  It makes the cupcakes really light and gives them a nice fine crumb.  If you don’t have any cake flour but you do have cornstarch, use this post from Joy the Baker and turn some of your regular flour into cake flour.

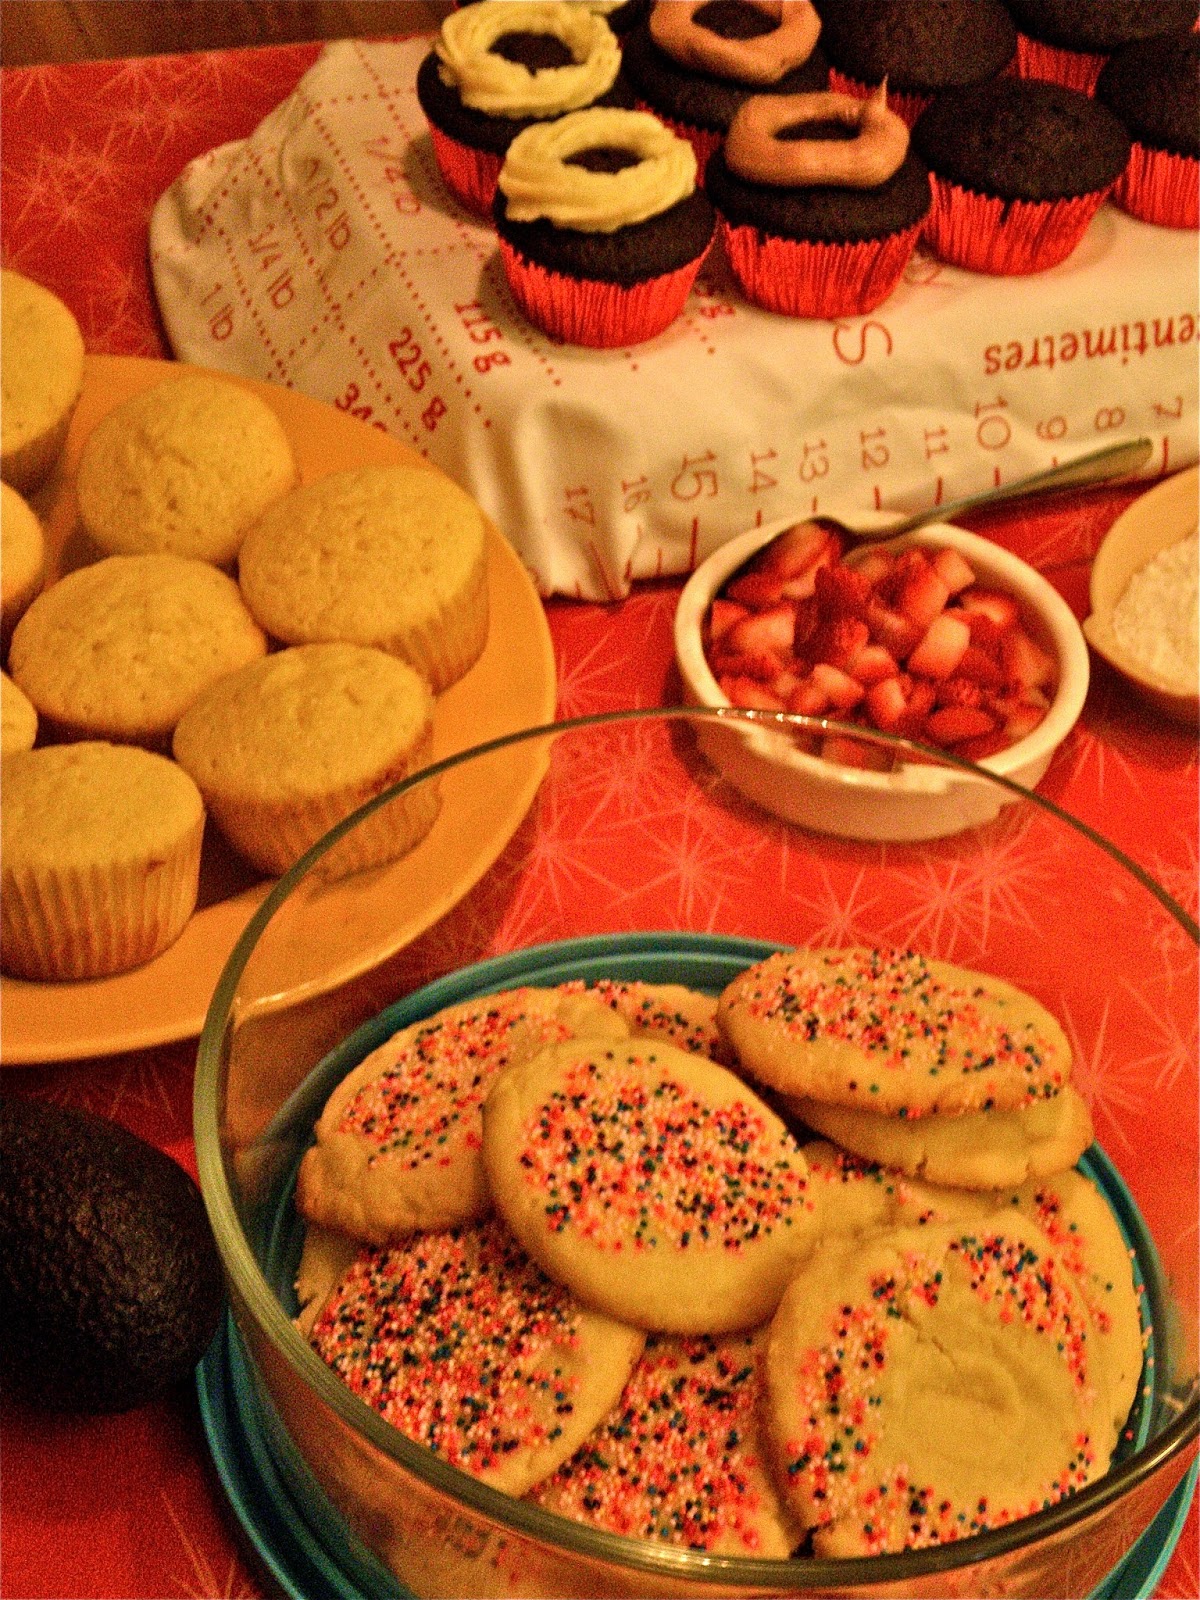
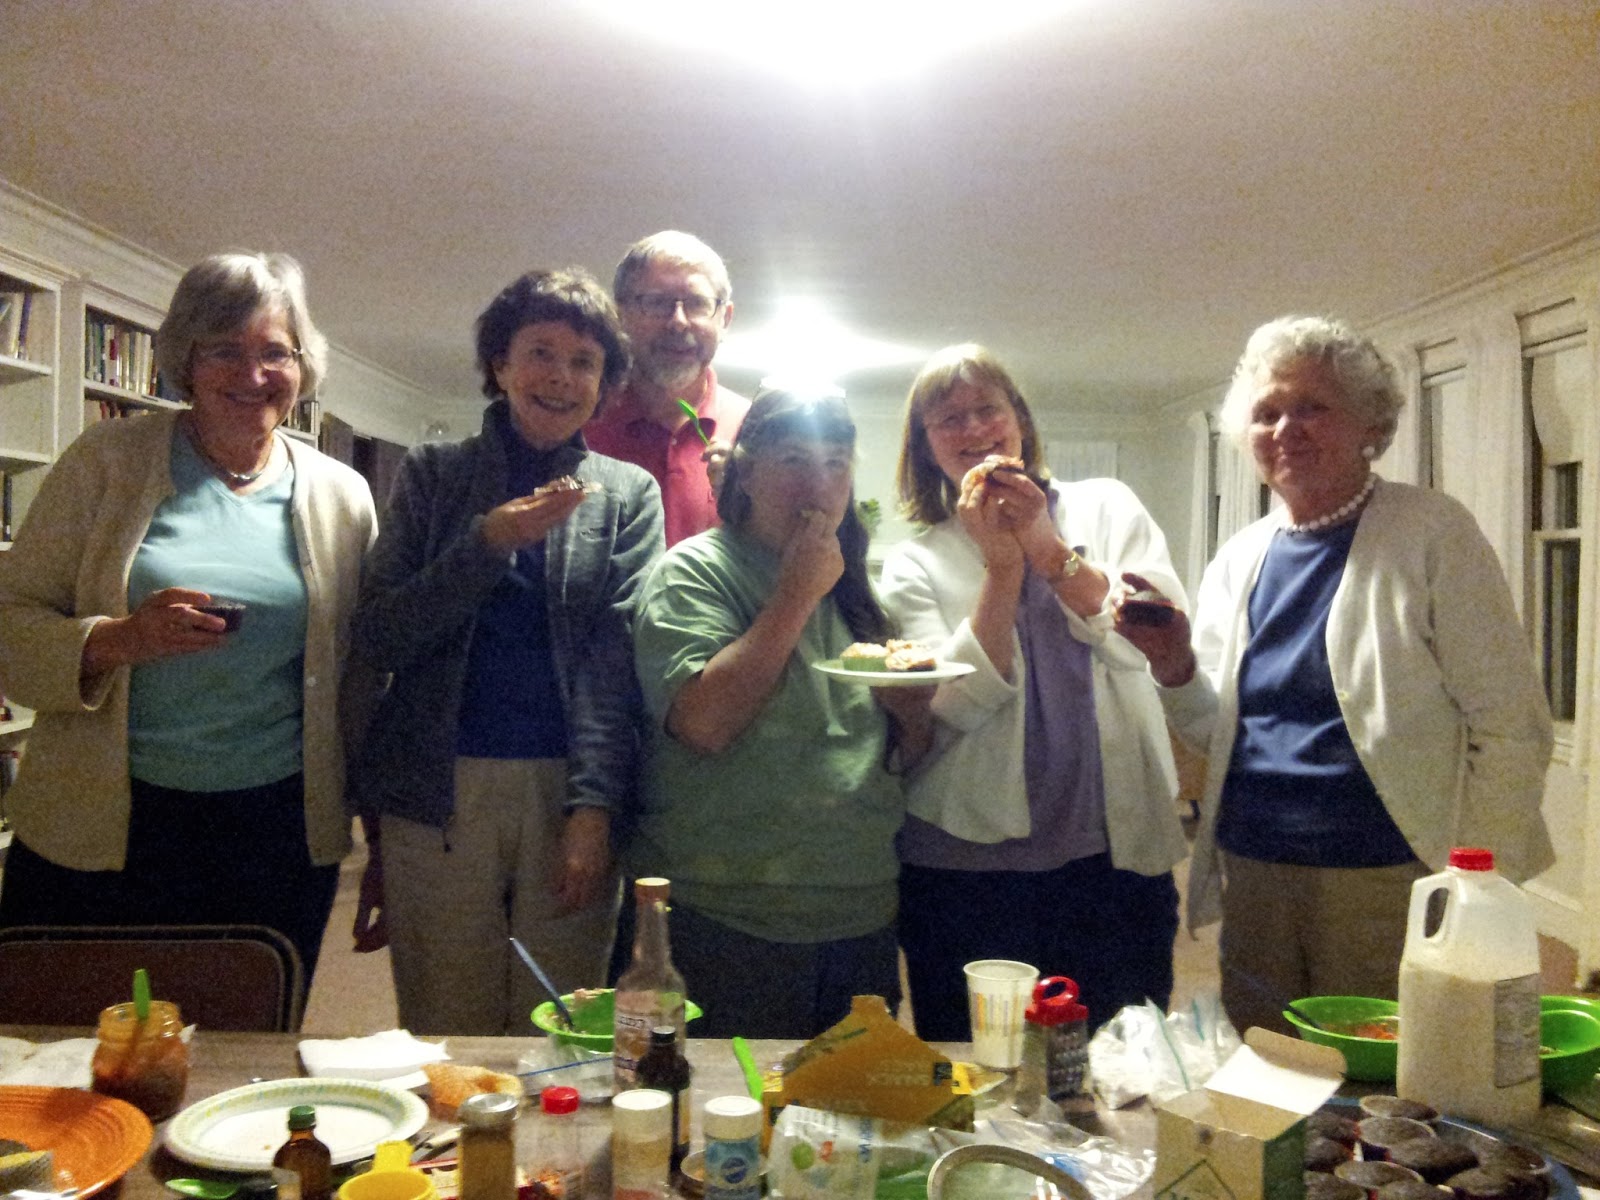
I made these for an event we had at my Quaker meeting last night.  Every Wednesday in the summer, my meeting hosts a Wellesley Wednesday cookout, where everyone brings something to share and then someone presents on an interesting topic.  Well, yesterday, the interesting topic was THIS BLOG!  I had so much fun telling everyone all about A Calculated Whisk and how it all works–some of them did not even know what a blog was!

After the discussion, we made frosting together!  I showed everyone how to stuff a cupcake with salted caramel, and how to use sugar, butter, a little milk and salt, and flavorings to make a delicious small batch of buttercream.  I brought all kinds of fun things for people to flavor their frosting: grenadine, vanilla, vanilla beans, cinnamon, cocoa, almond extract, peppermint extract, salted caramel, and lime and lemon zest.  We had a blast!

Salted Caramel Cupcakes Recipe
Yield: 20 cupcakes
Prep time: 25 minutes
Cook time: 20 minutes

Ingredients for the cupcakes (adapted from this recipe at Cookies & Cups):

1 3/4 cups cake flour
1 1/4 cups all purpose flour
1 3/4 cups sugar
2 1/2 teaspoons baking powder
1/2 teaspoon salt
1 cup butter (2 sticks), at room temperature, cut into chunks
4 eggs
1 cup milk (I used 2%)
2 teaspoons vanilla

1 cup salted caramel sauce, for filling

Ingredients for the frosting:

1 cup salted caramel sauce
4 cups powdered sugar, sifted
1/2 cup unsalted butter (1 stick), at room temperature
1/4 teaspoon salt
1 teaspoon vanilla

To make the cupcakes, preheat the oven to 350 and line your muffin tins with paper liners.

In a large bowl, combine the flours, sugar, baking powder, and salt.  Use a mixer to beat the mixture on low speed for about a minute to make everything light and fluffy.

With the mixer still on low, add the butter a couple of pieces at a time.  Mix until it looks like coarse sand.  Slowly pour in the milk and vanilla and mix until combined.

Add the eggs one at a time, mixing all the while and scraping down the sides of the bowl with a spatula as needed.  Raise the mixer speed to medium and beat for about two minutes until the batter is really smooth.

Fill your cupcake liners about 2/3 full.  Bake for 15-20 minutes, or until the cupcakes are puffed and set, but not browned, and a toothpick comes out clean.  Remove to a rack to cool.  Make sure the cupcakes are completely cool before you fill or frost them.

To fill the cupcakes, use a small paring knife to cut a small cone-shaped piece out of the top of the cupcake, making sure you don’t cut too close to the bottom of the cupcake.  Spoon salted caramel in to fill the cone.

To make the frosting, mix all ingredients by hand or with a mixer until smooth.  Spread or pipe onto cooled, filled cupcakes.

If desired, drizzle some salted caramel and sprinkle a little bit of sea salt on top of the frosted cupcakes.

This post contains affiliate links. As an Amazon Associate I earn from qualifying purchases.

Tasty Food Photography eBook

Filed Under: recipe Tagged With: baking, buttercream, caramel, chocolate cupcakes, cupcakes, frosting, salted caramel, vanilla cupcakes

Chewy Chocolate Almond Cookies

June 16, 2013 By Becky 2 Comments


Guess what?  In only 20 minutes, you can have rich, chewy chocolate almond cookies with no gluten, no butter or oil, no egg yolks, and no dairy!  It sounds too good to be true, but these cookies are really delicious!

You’ll end up with a couple of egg yolks, which you could save for ice cream.

The bad news is that my bag of almond flour is now almost gone!  I’ll definitely be buying more.  From financiers to mocha brownies to these cookies, it’s my new favorite healthy baking ingredient.  Go get some and make these today!

Note:  You won’t taste the coffee in these cookies–I just added it to bring out the chocolate flavor.  You can leave it out if you want a decaf cookie :0.

Ingredients (adapted from Heather’s Dish):

2 cups almond flour
1/2 cup sugar
2 rounded tablespoons cocoa
1 teaspoon finely ground coffee (optional)
1/4 teaspoon salt
2 egg whites
1/2 teaspoon vanilla
1/4 teaspoon almond extract (optional)

Preheat the oven to 350, and line a cookie sheet with parchment paper.  In a medium bowl, mix together the dry ingredients.  Add the egg whites, vanilla, and almond extract and stir until the dough comes together.

Drop tablespoon-sized balls of dough onto the parchment paper, and flatten the tops slightly with your hand or a spoon (the cookies will not spread much at all while cooking).  Bake for 10-15 minutes, until crisp on the outside but not burned on the bottoms.  Cool on a wire rack.

Filed Under: dessert, gluten free, recipe Tagged With: almond, almond flour, baking, chocolate, cookies, dairy free, healthy

Baked Eggs with Parmesan and Chives

June 9, 2013 By Becky 4 Comments


This is the perfect breakfast!  In my opinion, baked eggs are really special.  It’s something about the texture of the whites–they turn into a perfectly smooth, savory custard.  With a rich parmesan crust and a sprinkling of chives, these baked eggs are the best I’ve ever had.

If you’ve never tried baked eggs, go fire up your oven!  I promise you won’t regret it.

Ingredients (per person):

1/2 teaspoon butter
1-2 tablespoons heavy cream
1-2 eggs
Pinch of salt
2 tablespoons freshly grated parmesan cheese
1 teaspoon chopped fresh chives

Preheat the oven to 350.  Place a half teaspoon of butter in the bottom of an individual ramekin, and place it in the oven to melt the butter.

When the butter is melted, remove the ramekin from the oven.  Add a splash of cream.  Add the eggs, being careful not to break the yolks.  Sprinkle the salt, parmesan, and chives on top.

Return the ramekin to the oven and bake for 12 minutes, or until the whites are just almost set (the eggs will continue to cook a little after they come out of the oven).  The yolks will still be runny.  Serve hot with buttered toast.

Filed Under: breakfast, recipe, uncategorized, vegetarian Tagged With: chives, eggs, five ingredients or less, parmesan

Mocha Almond Flourless Brownies

June 8, 2013 By Becky 4 Comments

Yesterday I got some almond flour and blue cornmeal in the mail from Bob’s Red Mill.  I was super excited to try some chocolate baked goods with the almond flour.  Did you know it’s just ground-up almonds?  Amazing.  Full of heart-healthy fats and protein instead of the empty carbs in flour.

I decided to try these flourless brownies, adapted from this recipe on Om Nom Ally.  They are really good!  The coffee and almond flavors are subtle, but add an extra richness to the chocolate flavor.  The brownies are really fudgy and moist, which makes them very satisfying.  Just one is enough (until the craving strikes again an hour later…).

These brownies are not overly sweet.  I actually added extra sugar, because the original recipe only called for 2 tablespoons and I didn’t want a bitter brownie.  I think my version came out great, but I would have dusted them with some powdered sugar if I hadn’t been out.

Ingredients (makes 9-12 brownies):

1 cup almond flour (finely ground almonds)
1/2 cup cocoa, plus extra for dusting
1-3 teaspoons finely ground coffee, to taste
1/4 teaspoon salt
1/2 teaspoon baking powder
1/2 cup sugar
1 stick (8 tablespoons) butter, melted, plus extra for greasing the pan
1/2 cup milk
2 eggs
1 teaspoon vanilla
1/2 teaspoon almond extract
Powdered sugar for dusting (optional)

Preheat the oven to 350.  Grease an 8 x 8 baking dish and powder the bottom and sides with cocoa.

In a large bowl, mix the almond flour, cocoa, coffee, salt, and baking powder.

In a small bowl, whisk together the sugar, butter, milk, eggs, and extracts.  Add the wet ingredients to the dry and mix until combined.

Pour the batter into the prepared pan, and bake for 25-30 minutes or until a toothpick comes out clean.  Cool and cut into squares.


Filed Under: dessert, gluten free Tagged With: almond, baking, brownies, chocolate, coffee, flourless, mocha

Garlic Honey Grilled Shrimp

June 4, 2013 By Becky 2 Comments

 
Yesterday I really wanted to fire up the grill and make some shrimp.  That is, I wanted my boyfriend to fire up the grill and make me some shrimp.  To be totally honest, I don’t know how to grill.  Coals and lighter fluid and all that–it’s a mystery to me.  Give me a hot grill, though, and I’ll totally stand there and flip.  I’ve got that part under control.
 
Anyway, Ben wasn’t excited about grilling.  I, however, was super excited about the yummy garlic honey marinade I’d dreamed up, and decided I could just broil them.  I’ve made skewers of shrimp in the broiler before and they always come out great.  But, at the last minute, Ben changed his mind and fired up the grill.  I guess he didn’t like the thought of what a 500 degree oven would do the temperature in our apartment on this 90-degree day.  So, I got to grill in the end and we had a great time lounging on the patio, flipping shrimp skewers.
 
We ate these on top of this salad and it was a very satisfying combination.
 
    
Ingredients (serves 2-3):
 
1 pound shrimp, peeled and deveined,
tails on
4 tablespoons olive oil
1 teaspoon garlic paste
2 1/2 tablespoons honey
Salt and freshly ground black pepper
1/4 teaspoon cumin
Pinch of cayenne


Soaked wooden skewers (soak in hot water for 30 minutes or more to keep them from catching fire)
 
Mix the olive oil, garlic, honey, and spices, and pour over the shrimp.  Toss to coat.  Marinate for up to 30 minutes at room temperature or 2 hours in the refrigerator.
 
Prepare the grill, or preheat your broiler.
 
Skewer the shrimp–I like to thread the skewers through each shrimp twice so they are easy to flip on the grill.  I used six skewers for this recipe, with 5-6 shrimp on each skewer.

Grill or broil for about 3 minutes per side, or longer as necessary, until charred in spots and opaque throughout.  Serve hot.


Filed Under: recipe Tagged With: garlic, grilling, honey, shrimp

Chickpea Mushroom Spread

May 29, 2013 By Becky Leave a Comment

In my last post, I shared a recipe for gambas al ajillo inspired by my meal at Solea.  The other thing I was dying to try at home was Solea’s chickpea spread, which they bring at the beginning of the meal with a basket of crusty bread.  It’s really delicious!  I could tell it had chickpeas in it (plus, it was adorably garnished with one whole chickpea), but I couldn’t tell what made it so much richer, and so different from, hummus.

Luckily, our waiter didn’t mind telling us the other key ingredient–porcini mushrooms!  I had never cooked with them before, and they smelled really funky before they were reconstituted.  But, it was worth it.  I was rewarded with this hearty dip, which I think is just as good as what I had at Solea.

Ingredients (makes about 1 1/2 cups):

1 15 ounce can of chickpeas, rinsed and drained
Juice of half a lemon, or to taste
Salt to taste
1/2 cup plus 1 teaspoon olive oil, plus more for serving
1/4 ounce dried porcini mushrooms
Paprika for serving, optional

Place the porcini mushrooms in a small bowl, and pour in very hot water to cover.  Let sit for 30 minutes.  Drain, reserving the soaking water, rinse, and pat dry.

Heat 1 teaspoon of olive oil in a small skillet over medium heat, and saute the mushrooms for about five minutes.

In a food processor, combine the chickpeas, lemon juice, salt, and mushrooms.  Turn the processor on and add the half cup of olive oil in a steady stream (you can use less oil and more mushroom water if you’d like).  If the spread seems too dry, add the mushroom soaking water a tablespoon at a time and process until smooth.

Taste for seasonings and adjust if needed.  Drizzle with olive oil and sprinkle with paprika, if desired.  Serve with crusty bread or vegetables for dipping.

(function() {
var li = document.createElement(‘script’); li.type = ‘text/javascript’; li.async = true;
li.src = (‘https:’ == document.location.protocol ? ‘https:’ : ‘http:’) + ‘//platform.stumbleupon.com/1/widgets.js’;
var s = document.getElementsByTagName(‘script’)[0]; s.parentNode.insertBefore(li, s);
})();

Filed Under: appetizer, recipe, uncategorized, vegan, vegetarian Tagged With: chickpeas, dip, five ingredients or less, healthy, mushrooms, Spanish, spread

Gambas al Ajillo–Sizzling Garlic Shrimp

May 29, 2013 By Becky 8 Comments

Gambas al ajillo (Sizzling Garlic Shrimp) | acalculatedwhisk.com Gluten free, Paleo, Whole30
It could not be easier or quicker to make gambas al ajillo at home! These sizzling garlic shrimp make an ideal paleo appetizer. With such a short and simple ingredients list and such delicious results, there’s no reason not to try it!

For my birthday, we went to dinner at Solea, a fabulous tapas restaurant in Waltham.  If you live in the Boston area and haven’t been, you need to try it!  It’s one of my absolute favorite restaurants.

Ben, my mom, and I ordered six tapas to share.  We got sizzling garlic shrimp, scallops in saffron cream, lamb meatballs in truffle cream sauce, greens sauteed with pine nuts and raisins, and baked goat cheese.  Everything was amazing.  I ordered a blood orange sidecar to drink, which was delicious, and we started out snacking on a really good chickpea-porcini mushroom spread (my take on that coming soon).  The whole meal was great and I highly recommend everything we ordered.

I decided the sizzling garlic shrimp would be fun to recreate at home.  At Solea they serve them still bubbling in a small cazuela.  You could achieve the same effect by putting the shrimp into ramekins and sticking them under the broiler for a couple of minutes before serving.  If you try that, don’t cook the shrimp all the way on the stovetop since they’ll finish cooking under the broiler.

Looking for more delicious and easy paleo shrimp recipes? Try these, which can all be made in 30 minutes or less: curry butter shrimp, pesto shrimp bake with squash and tomatoes, or roasted shrimp and asparagus with green goddess dressing.

Gambas al Ajillo--Sizzling Garlic Shrimp

Gambas al Ajillo--Sizzling Garlic Shrimp

Yield: 4-6 servings
Prep Time: 10 minutes
Cook Time: 15 minutes
Total Time: 25 minutes

It could not be easier or quicker to make gambas al ajillo at home! These sizzling garlic shrimp make an ideal paleo appetizer. With such a short and simple ingredients list and such delicious results, there's no reason not to try it!

Ingredients

  • 1/2 cup olive oil
  • 10 cloves garlic, peeled and thinly sliced
  • 1 pound raw shrimp, peeled, deveined, and tails removed, defrosted if frozen
  • Salt and pepper to taste
  • 1/4 teaspoon smoked paprika
  • Pinch or two of red pepper flakes, optional

Instructions

  1. Preheat the broiler, if using.
  2. Heat the olive oil in a heavy skillet over medium-low heat. Add the garlic and saute, stirring frequently, for about five minutes, until the garlic is softened but not browned.
  3. Add the shrimp, raise the heat to medium high, and sprinkle with salt, pepper, paprika, and red pepper. Cook for three minutes on each side or until the shrimp are completely opaque. Serve hot. If you decide to broil the shrimp in individual ramekins, cook on one side in the skillet, flip over into the ramekins, top with some of the oil and garlic, and broil until opaque throughout, about 3 minutes.
© Becky Winkler (inspired by Solea)
Cuisine: Spanish

This post contains affiliate links.  If you make a purchase on Amazon after clicking one of my links, I receive a small commission (the price you pay is not affected).  Thank you so much for supporting my site!

Filed Under: appetizer, dinner, gluten free, paleo, recipe, whole30 Tagged With: five ingredients or less, garlic, shrimp, Spanish, tapas

Tipsy Coffee Ice Cream

May 28, 2013 By Becky Leave a Comment

I’m in love with my new ice cream maker!  It’s so easy to use.  I loved the strawberry ice cream I made the other day, and was ready to try again as soon as we finished eating it.  Since the machine was a gift from my mom, I decided to ask her what flavor she wanted, and she said Kahlua.  I convinced her that it would be even better with Jamaican rum cream, since that’s what I had.  And I added a little hint of coffee to round out the flavors.  You could probably make this with Kahlua, although it’s not creamy like rum cream and Bailey’s.  Let me know if you try it!

Anyway, this ice cream was seriously delicious.  My mom and I could not even wait for it to fully freeze before eating all of it (hence the melty pictures, sorry!).  It’s different than the strawberry ice cream because it doesn’t have an egg custard base, but it was still very creamy.  I didn’t miss the eggs at all (plus, I was out).  It also means this ice cream is easier to make!  Win-win-win.

P.S. I store my ice cream in recycled coffee cans.  Not just my coffee ice cream, but it’s especially fitting here.  They are a good size, and convenient with the snap-on lids.

Ingredients (adapted from this recipe on Annie’s Eats; makes about 3 cups or 6 servings):

1 cup 2% milk
2/3 cup sugar
1 cup whole coffee beans
Pinch of salt
1 3/4 cups heavy cream, divided
1/4 cup rum cream or Irish cream
1/2 teaspoon vanilla
1/4 teaspoon finely ground coffee or espresso powder

Combine the milk, sugar, coffee beans, salt, and 1/2 cup of the cream in a saucepan over medium heat.  Cook, stirring, until the mixture is hot and starting to bubble around the edges.  Turn off the heat and let steep at room temperature for an hour or so.

Strain the coffee mixture into a bowl.  Add the remaining 1 1/4 cups of cream, the rum cream, vanilla, and coffee.  Stir and chill in the refrigerator until completely cold.  Freeze in an ice cream maker and enjoy!

Filed Under: recipe Tagged With: coffee, ice cream, irish cream, rum, rum cream

Double Strawberry Ice Cream

May 26, 2013 By Becky Leave a Comment

You may have noticed I am on a bit of a strawberry kick recently (see no-bake strawberry swirl cheesecake bars, strawberry shortcakes with balsamic chocolate glaze, strawberry & cream margaritas, and strawberry curd).  Well, the strawberry love continues.  This is partly because I still have a jar of strawberry curd in my fridge, and am tempted to add it to just about anything.  However, if you don’t feel like making strawberry curd (but really, why wouldn’t you?  twenty minutes and your strawberries will last for weeks in the fridge in a delicious, spreadable form) you can still make this ice cream.  Just omit the strawberry curd for single strawberry ice cream, or replace it with an equal amount of fresh strawberry puree.

This ice cream is rich and creamy thanks to the vanilla bean, strawberry curd, and custard base.  You have to try it!  It’s also a wonderfully pastel shade of pink, my favorite color.

Ingredients (makes 1 1/2 quarts, adapted from Martha Stewart):

8 egg yolks (save the whites for breakfast or meringues)
2/3 cup plus 2 tablespoons sugar, divided
2 cups milk (I used 2%, but Martha calls for skim)
1/4 teaspoon salt
1/2 vanilla bean
1 pound strawberries, hulled and finely chopped
2 cups heavy cream
1/3 cup strawberry curd or fresh strawberry puree

In a saucepan (off the heat for now), combine the egg yolks, 2/3 cup of sugar, and salt.  Gradually whisk in the milk.  Scrape the seeds of half a vanilla bean into the mix, and throw the bean in, too.

Heat the mixture over medium heat and stir constantly with a wooden spoon until thickened, about 10-15 minutes.

Prepare a bowl set oven an ice bath (a larger bowl filled with ice or ice water).  Place a fine-meshed sieve on top.  Pour the thickened custard through the sieve, discarding the vanilla bean.  Stir in the cream and strawberry curd.  Let the mixture chill, stirring occasionally.  When the mixture is cold, I recommend you refrigerate it overnight to make sure it’s REALLY chilled.

Mix the chopped strawberries with 2 tablespoons of sugar and set aside.

When the custard mixture is completely chilled, freeze in your ice cream maker.  A few minutes before the ice cream is ready, add in the strawberries.

Transfer to an airtight container and freeze for at least 2 hours before serving.

You can also sandwich some of this between two honey vanilla cookies for the world’s best ice cream sandwich!

(function() {
var li = document.createElement(‘script’); li.type = ‘text/javascript’; li.async = true;
li.src = (‘https:’ == document.location.protocol ? ‘https:’ : ‘http:’) + ‘//platform.stumbleupon.com/1/widgets.js’;
var s = document.getElementsByTagName(‘script’)[0]; s.parentNode.insertBefore(li, s);
})();

Filed Under: recipe Tagged With: ice cream, ice cream sandwich, strawberry, strawberry curd, vanilla bean

Honey Vanilla Cookies to Kickstart Jesi’s Art

May 25, 2013 By Becky Leave a Comment

Have you heard of colony collapse disorder?  My friend Jesi, an artist based in Vermont, is working on a participatory project with a large installation about colony collapse disorder and the plight of the honeybee.  The coolest part is that she’s creating a canvas for each person who sponsors her project, in different sizes depending on the amount you donate, and sending them out to her supporters after the show!  Her art is amazing and I can’t wait to see what she creates for this show.

Jesi asked me to post a honey cookie recipe that she could bake to show her thanks to supporters who pledge $25 or more.  Her project only has one more day left on Kickstarter!  You can read about the project and donate here.  You should consider giving!  Even if you don’t have $25 to give, give any amount and then make yourself these cookies!  Jesi and the honeybees will thank you.

Note: I hadn’t used my honey in a while and it was totally crystallized!  Don’t worry if that happens to you.  Just spoon out your honey into a glass jar and heat it in a pan of simmering water, stirring occasionally, until it’s clear and liquefied.  If you do this, let the honey cool down a little before you add it to the dough.

Ingredients (makes one dozen; adapted from this recipe on Lulu the Baker):

1 cup flour
1/3 cup sugar
6 tablespoons cold salted butter, cubed (or use unsalted and add 1/2 teaspoon salt)
1/2 vanilla bean
2 tablespoons honey, plus extra for brushing
Flaky sea salt (I use Maldon), optional

In a food processor, blend the flour, sugar, and butter until it looks like coarse breadcrumbs.

Add the honey and vanilla bean seeds and pulse just until combined.  Use your hands to pat the dough into a ball, wrap it in plastic wrap, and refrigerate for half an hour or so.  Try not to eat all the dough at this point.  It’s delicious!

Preheat the oven to 325.

On a lightly floured surface, roll the dough out to about 1/4 inch thick.  Using a cookie cutter or round jar, cut out cookies about 2 inches across.  Place on a parchment lined baking sheet and bake for about 10-12 minutes, until the cookies are starting to brown around the edges.

Brush the cookies with honey while they’re still warm, and sprinkle with a little flaky sea salt if desired. I love the salty and sweet combo, so I highly recommend it!

Filed Under: recipe Tagged With: art, baking, cookies, five ingredients or less, honey, vanilla, vanilla bean

Lentil & Corn Fritters (plus Lentils & Couscous)

May 23, 2013 By Becky 7 Comments

I made lentils the other day, and was really surprised at how good they were.  They were easy to make and flavorful.  We served ours on top of pearl couscous, my new favorite grain product.  It made a great  healthy dinner, and we had tons of lentils left over.
I got the idea to make lentil fritters, and invented the fritter recipe using masarepa
(my other favorite grain product).  If you have leftover lentils, these are very easy and quick to make.  If not, you should make this first recipe and have it for dinner with rice or couscous.  The next day, you can make the fritters with the leftovers.
Ingredients for lentils:
1 pound red lentils, picked over and well washed
1 tablespoon olive oil
1/2 onion, chopped
3 cloves garlic, minced
1/2 teaspoon cumin
4 cups water
1 cube chicken or vegetable bouillon
Salt and pepper to taste
3 tablespoons red or white wine
2 wedges Laughing Cow creamy Swiss cheese (optional)
Chopped scallions and cilantro for garnish
Cooked rice or couscous for serving
Heat the olive oil in a saucepan over medium heat.  Add the onion, garlic and cumin and saute until softened, about five minutes.
Raise the heat the medium high.  Add the lentils, water, and bouillon.  Bring to a boil, then reduce heat and simmer, covered, for about twenty minutes.  The lentils should be tender and lightened in color, with almost all the liquid absorbed.
Add the wine and salt and pepper to taste.  Raise the heat and cook for another 2-3 minutes.  Stir in the cheese, if using, and stir until smooth.
Serve over rice or couscous with scallions and cilantro on top.

Ingredients for the fritters:

1 1/2 cups leftover lentils (from above recipe, or any well-cooked red lentils)
1 cups frozen corn kernels (no need to defrost)
3 scallions, sliced
3 tablespoons chopped cilantro
1 cup masarepa

Sea salt
1 cup hot water
Canola oil or olive oil for cooking
Lime wedges for serving

In a large bowl, mix the leftover lentils, corn, scallions, cilantro, masarepa, and a pinch or two of salt.  Add the hot water and stir to combine.  Let sit for five minutes.

Meanwhile, heat about 1/8 inch of oil in a heavy skillet over medium-high heat.  When the oil is hot enough, a droplet of water should bounce and skitter across the skillet.

Using your hands, make balls of dough a little larger than golf balls and flatten them slightly to form patties.  Fry until golden brown on both sides, about 3 minutes per side.  Be gentle when you flip them–you’ll lose a few pieces of corn, but that’s okay.

Drain on paper towels.  Serve hot, with sea salt sprinkled on top and lime wedges for squeezing over.

Extra uncooked fritter mixture can be kept for up to three days in the refrigerator.


This post contains affiliate links.  If you make a purchase on Amazon after clicking one of my links, I receive a small commission (the price you pay is not affected).  Thank you so much for supporting my site!

Filed Under: appetizer, dinner, recipe, uncategorized, vegan, vegetarian Tagged With: corn, fritters, healthy, lentils, snack

A Cupcake Party and Simple Chocolate Buttercream

May 20, 2013 By Becky Leave a Comment

We had a decorate-your-own cupcake party last night!  I got the idea from this post on A Beautiful Mess.  People had so much fun choosing a cupcake flavor and heaping on toppings inside the ring of frosting.  Carrot cupcakes were the most popular, and I saw lots of people spooning on strawberry curd.  It wasn’t too bad waking up to leftovers this morning, either.  I am a big fan of cake for breakfast.  Maybe the decorate-your-own cupcake station can become a permanent feature around here?
In case you want to throw your own cupcake party, here are the recipes I used:
  • Carrot Cupcakes with Vanilla Bean Neufchatel Frosting
  • Double Chocolate Vegan Cupcakes
  • Vanilla Bean Cupcakes from Annie’s Eats
  • Strawberry Curd
  • Salted Caramel Sauce
For the chocolate cupcakes, I was too lazy to make the Swiss meringue buttercream that’s in the post for the Double Chocolate Vegan Cupcakes, so I made a simple chocolate buttercream.  Here’s the recipe in case you want to make it!


Ingredients (makes enough for 12 cupcakes): 

8 tablespoons (1 stick) butter, softened
1 1/2 cups powdered sugar, sifted
2 ounces bittersweet chocolate, melted
Pinch of salt 

Combine all ingredients and beat on high speed until smooth.

I also put out these toppings:
  • Shredded coconut
  • Chopped pecans
  • Chopped strawberries with a little sugar
  • Sprinkles
  • Mini m & ms
There are so many other things that would be great on cupcakes!  What are your favorite cupcake flavors, frostings, and toppings?

(function() {
var li = document.createElement(‘script’); li.type = ‘text/javascript’; li.async = true;
li.src = (‘https:’ == document.location.protocol ? ‘https:’ : ‘http:’) + ‘//platform.stumbleupon.com/1/widgets.js’;
var s = document.getElementsByTagName(‘script’)[0]; s.parentNode.insertBefore(li, s);
})();

Filed Under: recipe Tagged With: baking, buttercream, chocolate, cupcakes, entertaining, five ingredients or less, frosting, party

  • « Previous Page
  • 1
  • …
  • 30
  • 31
  • 32
  • 33
  • 34
  • Next Page »

Hi, I’m Becky!

Welcome to A Calculated Whisk, where I share creative paleo and gluten-free recipes. Learn more about me here.

Connect with ACW on social media:

  • Email
  • Facebook
  • Instagram
  • Pinterest
  • RSS
  • Twitter

Looking for something?

Subscribe via email and get a free e-book!

Instant Pot Recipes

Instant Pot Colcannon

Instant Pot Colcannon

Instant Pot Balsamic Short Ribs

Instant Pot Tomato Sauce (made with fresh tomatoes)

Instant Pot Short Rib Ragu

Instant Pot Short Rib Ragu

In a hurry? Try these 30-minute recipes:

Lebanese Lemon Chicken #30MinuteMondays

Roasted Shrimp and Asparagus with Green Goddess Dressing (Paleo, Whole30)

Roasted Shrimp and Asparagus with Green Goddess Dressing

Huevos Divorciados with Sweet Potato Hash

Huevos Divorciados + Salsa Verde

Grilled Shrimp Skewers with Creamy Sesame Slaw (Gluten free, Paleo)

Grilled Shrimp Skewers with Creamy Sesame Slaw

my healthy aperture gallery
rodelle brand ambassador

Privacy Policy

All text and photographs (c) Rebecca Winkler 2013-2020 unless otherwise noted.

Copyright 2013-2020 Rebecca Winkler · Foodie Pro Theme by Shay Bocks · Genesis Framework · Powered by Wordpress