A Calculated Whisk

Creative paleo and gluten-free recipes

  • Home
  • About Me
    • Photography Portfolio
  • Cookbook
  • Recipe Index
  • Paleo
    • Paleo Eating
    • A Paleo Pantry
  • Blogging
You are here: Home / Archives for dairy free

Vietnamese Pork & Vermicelli Bowl

July 7, 2013 By Becky 1 Comment


There are lots of Vietnamese stores and restaurants in my neighborhood.  On lazy days I do all my shopping at Truong Thinh, the Vietnamese market around the corner, and pick up a banh mi for lunch. One of my favorite places to eat is Pho Hoa, where I love to order the House Special Vermicelli Plate (number 90 in case you’re going–Pho Hoa is a chain and there might be one near you!).  It comes with a bunch of delicious things, and rice paper wraps so you can make your own spring rolls.  The first time I ordered it, the waiter brought the rice paper wraps first and Ben and I tried to take a bite of them.  No dice.  They are dry like paper until you soak them in hot water.  Oops.

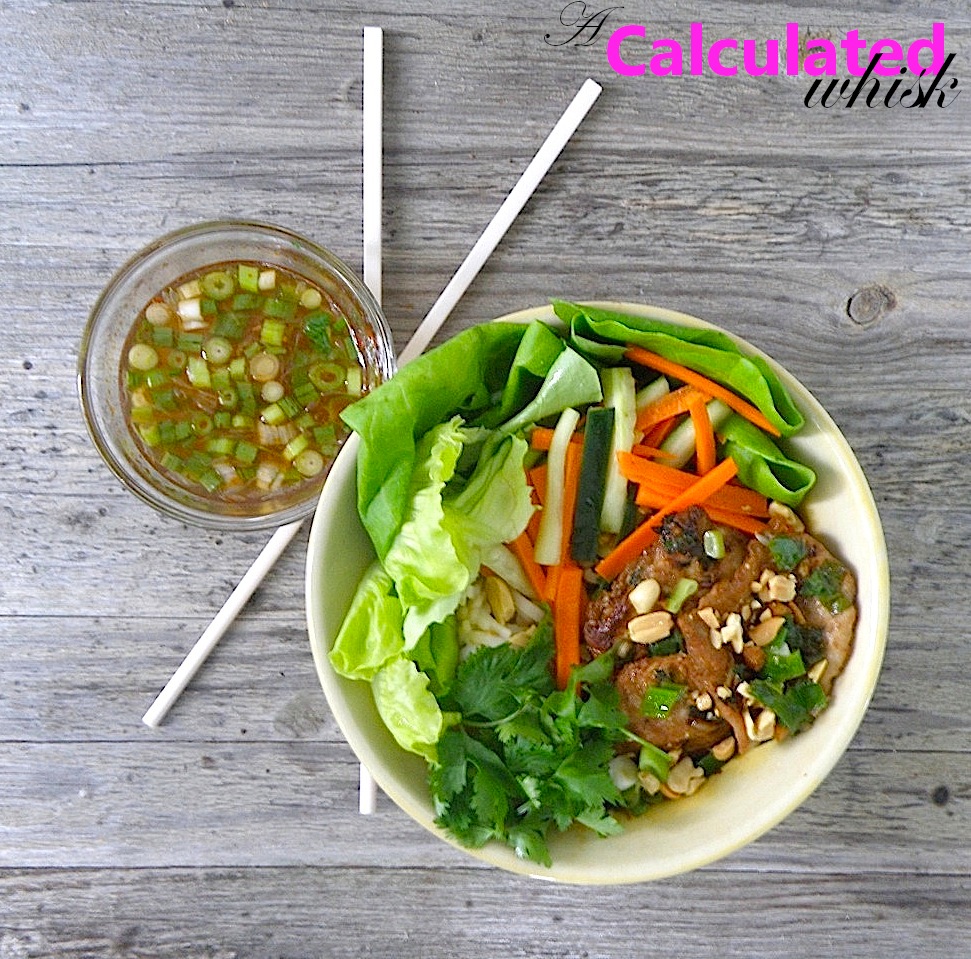
Anyway, the house special plate comes with those wraps (and a big bowl of hot water to soften them) and vermicelli, herbs and vegetables topped with grilled pork, meatballs, a spring roll, and shrimp & sugarcane.  It also comes with fish sauce on the side.  It’s SO good, and the grilled pork is my favorite.  I don’t know what they do to it.

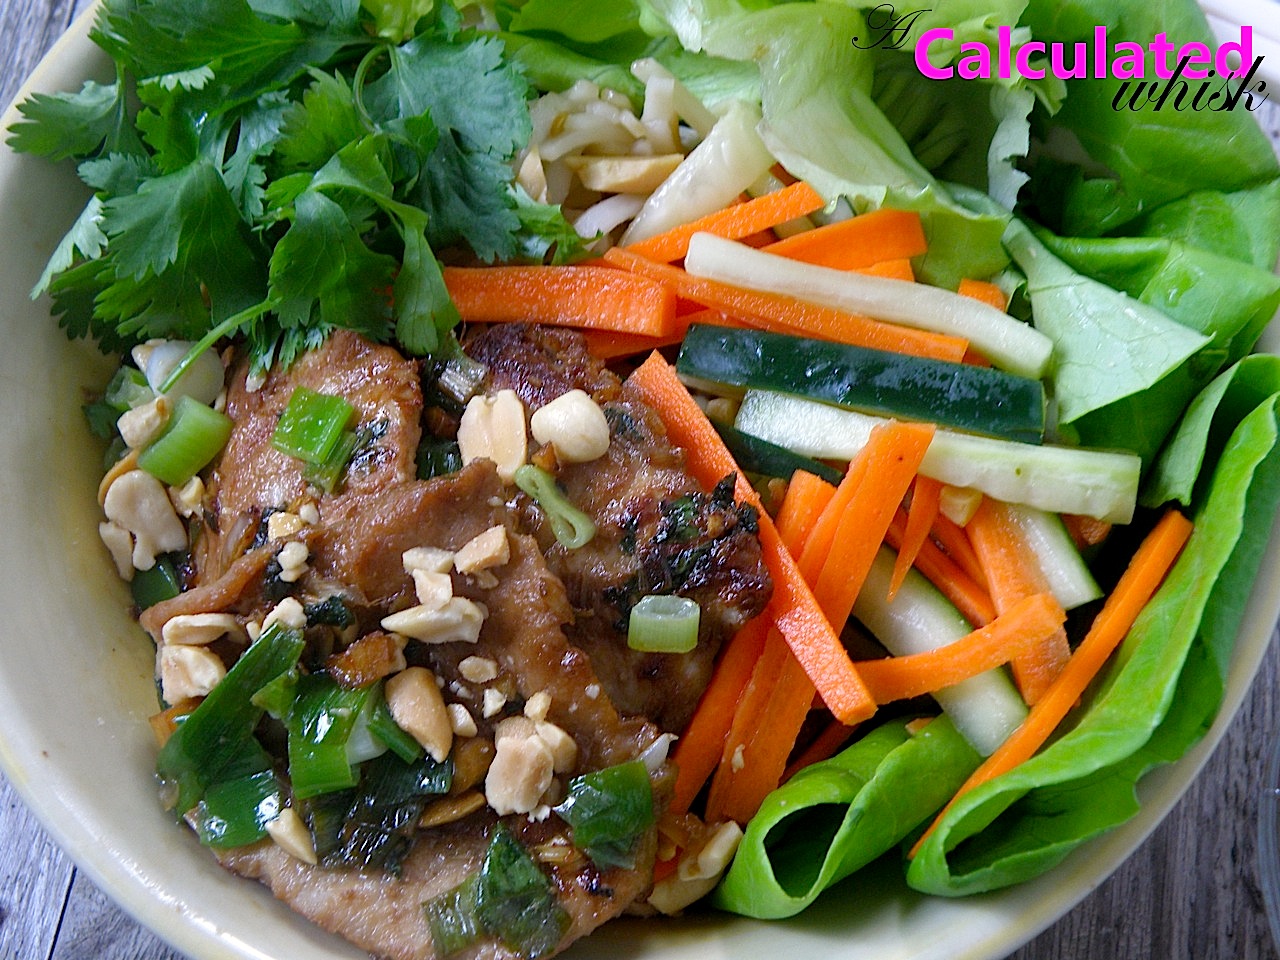
This dish is my attempt to recreate that dinner at home.  I have to tell you, it’s really good, but it’s not QUITE the same flavor I get at the restaurant.  You should still make it, though.  It’s super yummy and healthy and beautiful (and lots of fun to photograph, if you’re into that).  It has a lot of components, but almost all of them can easily be made in advance.  When it’s time to eat, just cook the pork and put together your bowl!

 
Ingredients (serves 4; adapted from The Culinary Chronicles):
 
For the pork:
 
5 cloves garlic, minced
1 shallot, minced
2 scallions, sliced
4 inch piece of lemongrass, finely minced
3 tablespoons cilantro, chopped
1 tablespoon brown sugar
1 tablespoon honey
2 tablespoons fish sauce
3 tablespoons soy sauce
3/4 to 1 pound pork tenderloin, sliced thinly
 
For the quick-pickled carrots and cucumbers:
 
1 carrot, peeled and cut into matchsticks
1 small cucumber, cut into matchsticks
4 tablespoons rice vinegar (no sugar or salt added)
2 tablespoons sugar
Pinch of salt
 
For the nuoc cham sauce:
 
Juice of 2 limes
1/4 cup fish sauce
1/4 cup sugar
3 tablespoons warm water
1/2 teaspoon chili paste
 
For the scallion oil:
 
1/4 cup vegetable oil
1/2 cup sliced scallions (3-4 scallions)
 
For serving:
 
8 ounces vermicelli, cooked according to package directions
1 head of Boston lettuce, leaves separated
Bunch of cilantro
Fresh bean sprouts (I bought them and forgot to get them out!)
Crushed roasted peanuts
 
To prepare the pork, mix all the ingredients for the marinade together and toss with the pork.  Cover and refrigerate for at least an hour before cooking.
 
To make the quick-pickled vegetables, pour the vinegar, sugar, and salt over the vegetables and toss to coat.  Let sit at room temperature for at least an hour before serving.  If you make them more than a couple of hours in advance, store them in the fridge.
 
For the nuoc cham sauce, mix all ingredients together.  Taste and adjust seasonings as necessary.
 
For the scallion oil, heat the oil in a large skillet over low heat.  When it’s hot, add the scallions and cook until wilted but still bright green, about three minutes.  Pour off the scallions and most of the oil and set aside.
 
Take the pork out of the fridge about ten minutes before you want to cook it.  Prepare the grill, or heat up the same skillet you used for the scallion oil over medium high heat.  Cook the pork, with a little marinade spooned on top, on both sides until browned and cooked through.  Brush cooked pork with the scallion oil before serving.
 
To serve, line a plate or bowl with lettuce leaves and vermicelli.  Top with pickled vegetables, bean sprouts, pork, and roasted peanuts.  Serve with nuoc cham sauce on the side.
 

Filed Under: dinner, recipe, uncategorized Tagged With: Asian, dairy free, healthy, noodles, pork, vermicelli, Vietnamese

Dairy-Free Lemon Curd

June 25, 2013 By Becky 24 Comments

 
Dairy-Free Lemon Curd
 
This dairy-free lemon curd is a lighter version of the classic. It’s still packed with irresistible sweet citrus flavor!
 
My dad and sister came over for dinner this weekend.  It was so much fun–my sister just turned 15, and she had never been to my apartment before!  I cooked them a belated birthday/father’s day celebratory dinner.  
 
We had thai shrimp curry with vegetables and coconut milk (so good–recipe coming soon), a salad my dad brought with a delicious dressing (I’ll try to score the recipe and post it–it involves hazelnut oil!) and a berry tart with coconut cream and dairy-free lemon curd.  My sister can’t eat any dairy, so I had to make lemon curd without the butter.  Good news–it’s just as delicious as the original, and even more lemony.
 
Dairy-Free Lemon Curd
 
I wanted to share the whole tart recipe with you, but the crust still needs some work.  Anyone have a good dairy-free tart crust recipe?  I’m going to work on getting one ready for the Fourth, because this tart happens to be very patriotic.  For the topping, we just whipped up some coconut cream with powdered sugar and vanilla, then folded it in to the lemon curd.
 
Dairy-Free Lemon Curd
 
Anyway, I couldn’t wait to share this delicious lightened-up lemon curd with you.  It’s a healthier way to enjoy my favorite spread!  Try it on pancakes or a dutch baby, swirl it with some greek yogurt, or pipe it inside some cupcakes.
 
If you’re looking for the original buttery version, it’s here.
 
Dairy-Free Lemon Curd

Dairy-Free Lemon Curd

Yield: 1 1/2 cups
Prep Time: 10 minutes
Cook Time: 15 minutes
Total Time: 25 minutes

This dairy-free lemon curd is a lighter version of the classic. It's still packed with irresistible sweet citrus flavor!

Ingredients

  • 4-6 organic lemons
  • 
1/2-3/4 cup sugar, to taste
  • Pinch of salt
  • 
2 eggs
  • 1 egg yolk
  • 1/2 teaspoon vanilla extract (optional)

Instructions

  1. Wash your lemons really well, and zest two of them. Mix the zest with the sugar in a small bowl, rubbing the mixture between your fingers to bring out the flavors of the zest (use 1/2 cup of sugar for a very puckery curd, and more if you want things a little sweeter). Set the lemon sugar aside (if you want to make extra lemon sugar, it's also delicious as a topping for muffins or cookies).
  2. Roll the lemons firmly under the palm of your hand to prime them to release the most juice. Juice lemons until you have 3/4 cup of lemon juice. Strain out any seeds. Add the juice, lemon sugar, and salt to a saucepan. Warm over medium heat, stirring constantly, until all the sugar is dissolved.
  3. Beat the eggs and egg yolk together in a medium bowl. While whisking constantly, slowly pour the warm lemon mixture into the eggs. Continue to beat for a minute or so.
  4. Return the mixture to the saucepan and cook over low heat, whisking constantly, until the mixture thickens, about 10-15 minutes. Remove from the heat and stir in the vanilla (the vanilla is optional--you won't really taste it, but it rounds out the flavor).
  5. Let the curd cool to room temperature, then transfer to a glass jar or another airtight container. Store in the refrigerator. Lemon curd will keep, refrigerated, for up to two weeks.

Notes

Recipe adapted from Genius Kitchen

© Becky Winkler
Cuisine: British

Filed Under: breakfast, dessert, recipe Tagged With: dairy free, lemon, lemon curd, preserves, spread, tart

Chewy Chocolate Almond Cookies

June 16, 2013 By Becky 2 Comments


Guess what?  In only 20 minutes, you can have rich, chewy chocolate almond cookies with no gluten, no butter or oil, no egg yolks, and no dairy!  It sounds too good to be true, but these cookies are really delicious!

You’ll end up with a couple of egg yolks, which you could save for ice cream.

The bad news is that my bag of almond flour is now almost gone!  I’ll definitely be buying more.  From financiers to mocha brownies to these cookies, it’s my new favorite healthy baking ingredient.  Go get some and make these today!

Note:  You won’t taste the coffee in these cookies–I just added it to bring out the chocolate flavor.  You can leave it out if you want a decaf cookie :0.

Ingredients (adapted from Heather’s Dish):

2 cups almond flour
1/2 cup sugar
2 rounded tablespoons cocoa
1 teaspoon finely ground coffee (optional)
1/4 teaspoon salt
2 egg whites
1/2 teaspoon vanilla
1/4 teaspoon almond extract (optional)

Preheat the oven to 350, and line a cookie sheet with parchment paper.  In a medium bowl, mix together the dry ingredients.  Add the egg whites, vanilla, and almond extract and stir until the dough comes together.

Drop tablespoon-sized balls of dough onto the parchment paper, and flatten the tops slightly with your hand or a spoon (the cookies will not spread much at all while cooking).  Bake for 10-15 minutes, until crisp on the outside but not burned on the bottoms.  Cool on a wire rack.

Filed Under: dessert, gluten free, recipe Tagged With: almond, almond flour, baking, chocolate, cookies, dairy free, healthy

  • « Previous Page
  • 1
  • …
  • 9
  • 10
  • 11

Hi, I’m Becky!

Welcome to A Calculated Whisk, where I share creative paleo and gluten-free recipes. Learn more about me here.

Connect with ACW on social media:

  • Email
  • Facebook
  • Instagram
  • Pinterest
  • RSS
  • Twitter

Looking for something?

Subscribe via email and get a free e-book!

Instant Pot Recipes

Instant Pot Colcannon

Instant Pot Colcannon

Instant Pot Balsamic Short Ribs

Instant Pot Tomato Sauce (made with fresh tomatoes)

Instant Pot Short Rib Ragu

Instant Pot Short Rib Ragu

In a hurry? Try these 30-minute recipes:

Berry Peachy Kale Salad with Candied Pecans

Summer Kale Salad with Peaches and Candied Pecans

Picadillo with Plantains from Well Fed Weeknights (Paleo, Whole30)

Picadillo with Plantains from Well Fed Weeknights

Paleo Chicken Piccata with Asparagus

Paleo Chicken Piccata with Asparagus

Caprese Frittata

Caprese Frittata

my healthy aperture gallery
rodelle brand ambassador

Privacy Policy

All text and photographs (c) Rebecca Winkler 2013-2020 unless otherwise noted.

Copyright 2013-2020 Rebecca Winkler · Foodie Pro Theme by Shay Bocks · Genesis Framework · Powered by Wordpress